

The Corner of Yum Blog
News, Recipes, Updates, and more…
Looking For Food Delivery in Cape Cod?
Corner of YUM is a sweet & savory catering service. Delivery is always free Cape-wide. You choose & order. I deliver and you enjoy. It's that simple. How easy is that? (DUH) Yum is just right around the corner! Get your orders in now!
Choose, order, enjoy. It's that easy.


On the corner of laid back and yum…Photo: Kennedy Jumping - Cape Cod, Massachusetts
Corner of YUM is a sweet & savory catering service.
We do not have a storefront and are strictly a bake/cook to order business.
We have graciously been given the opportunity to prepare delicious food for you out of the sprawling Cape Sea Grille kitchen, located in Harwich Port, MA.
Delivery is always free Cape-wide.
You choose & order. I deliver and you enjoy. It's that simple. How easy is that? (DUH)
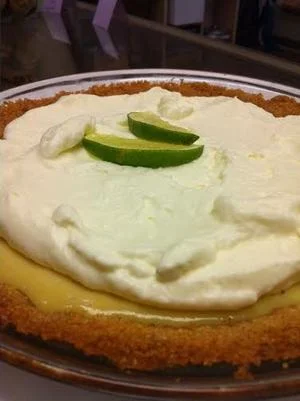
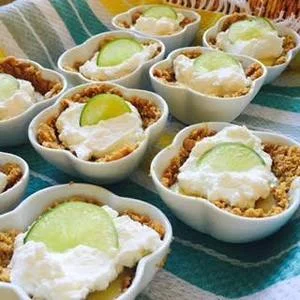
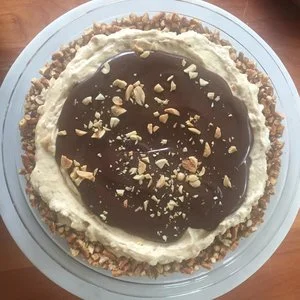
CORNER OF YUM OFFERINGS
Here’s some of what we’ve got to offer:
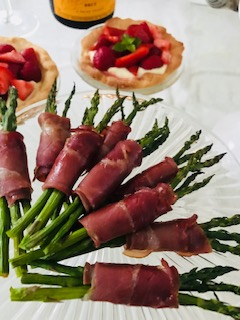
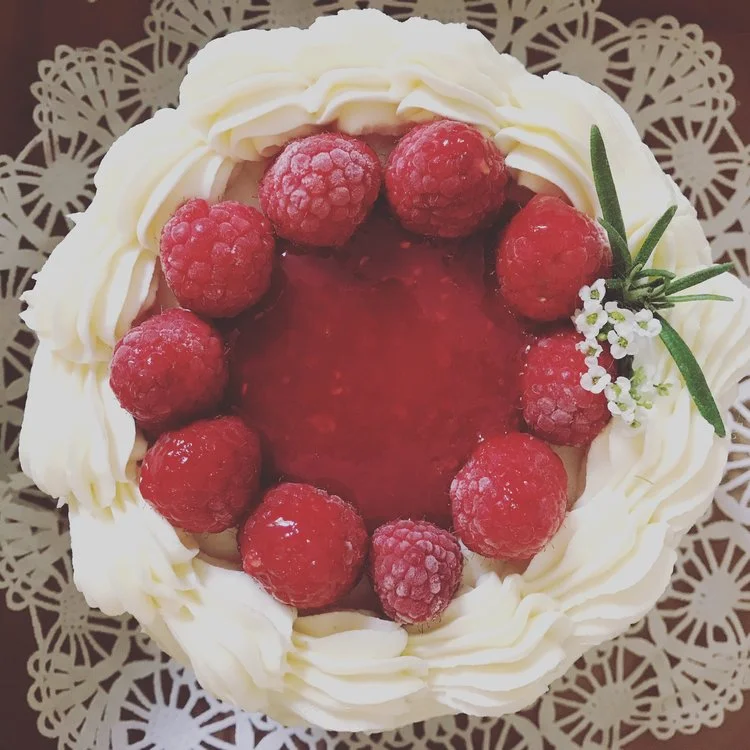
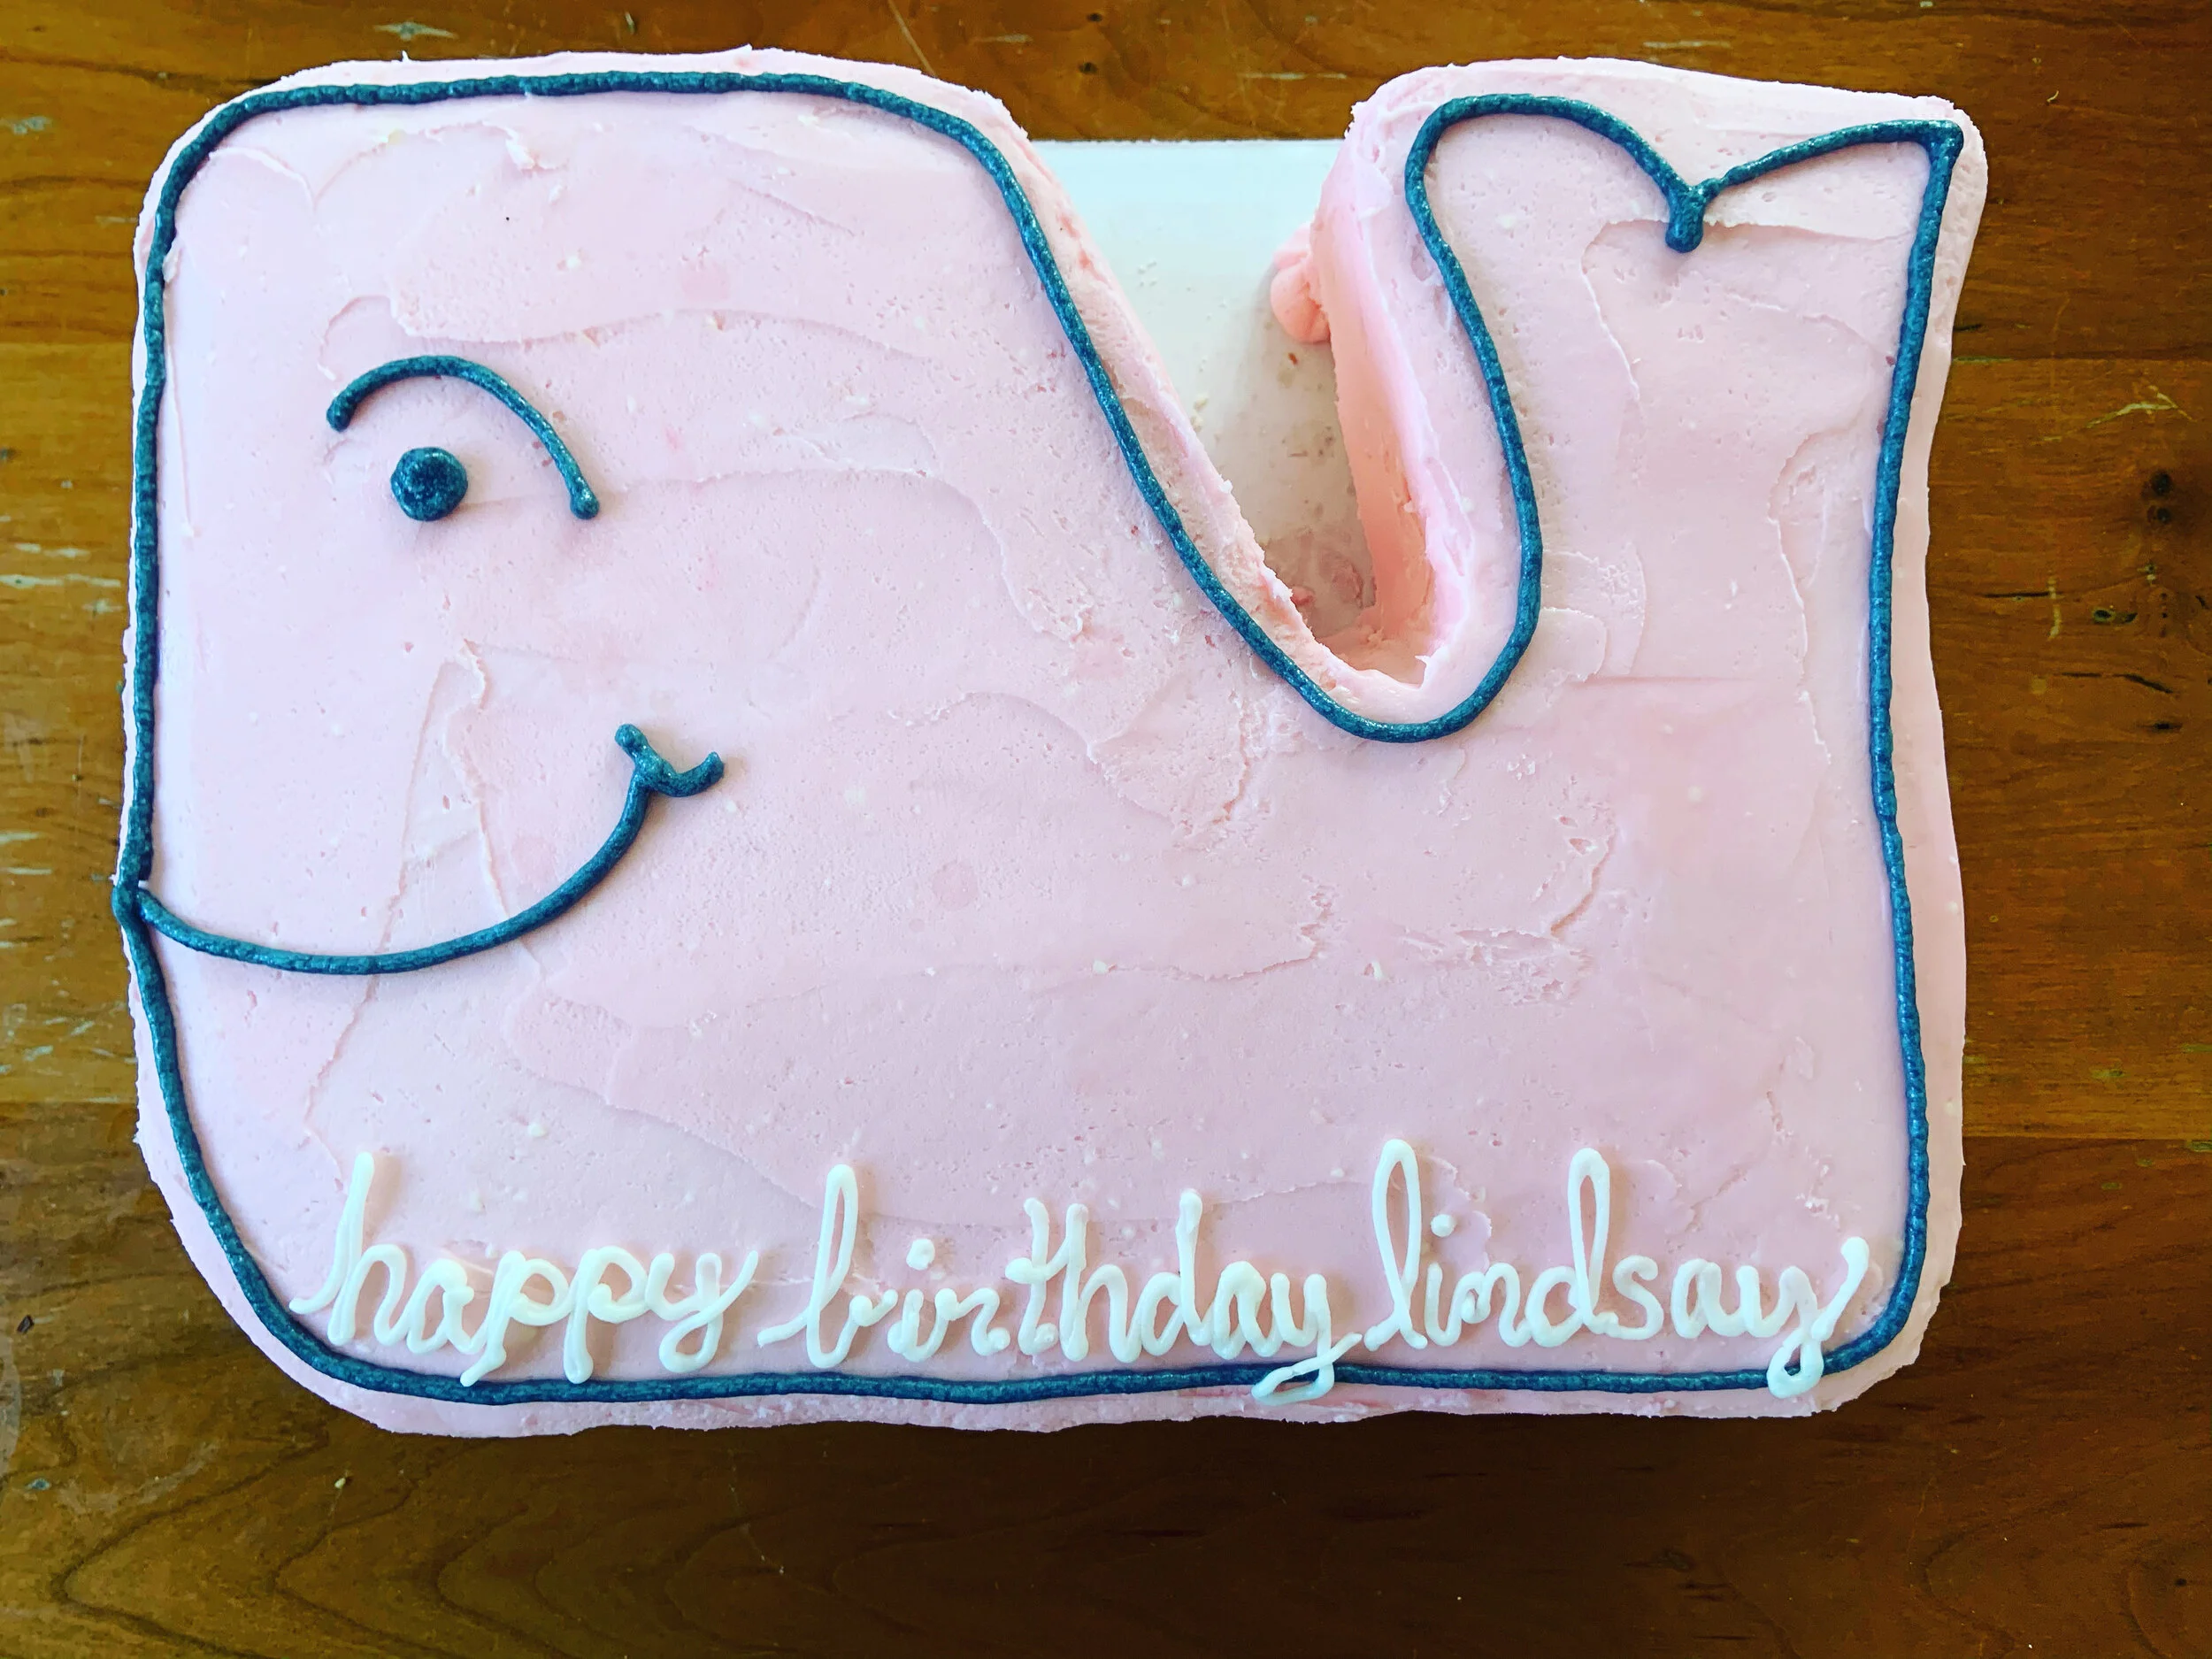
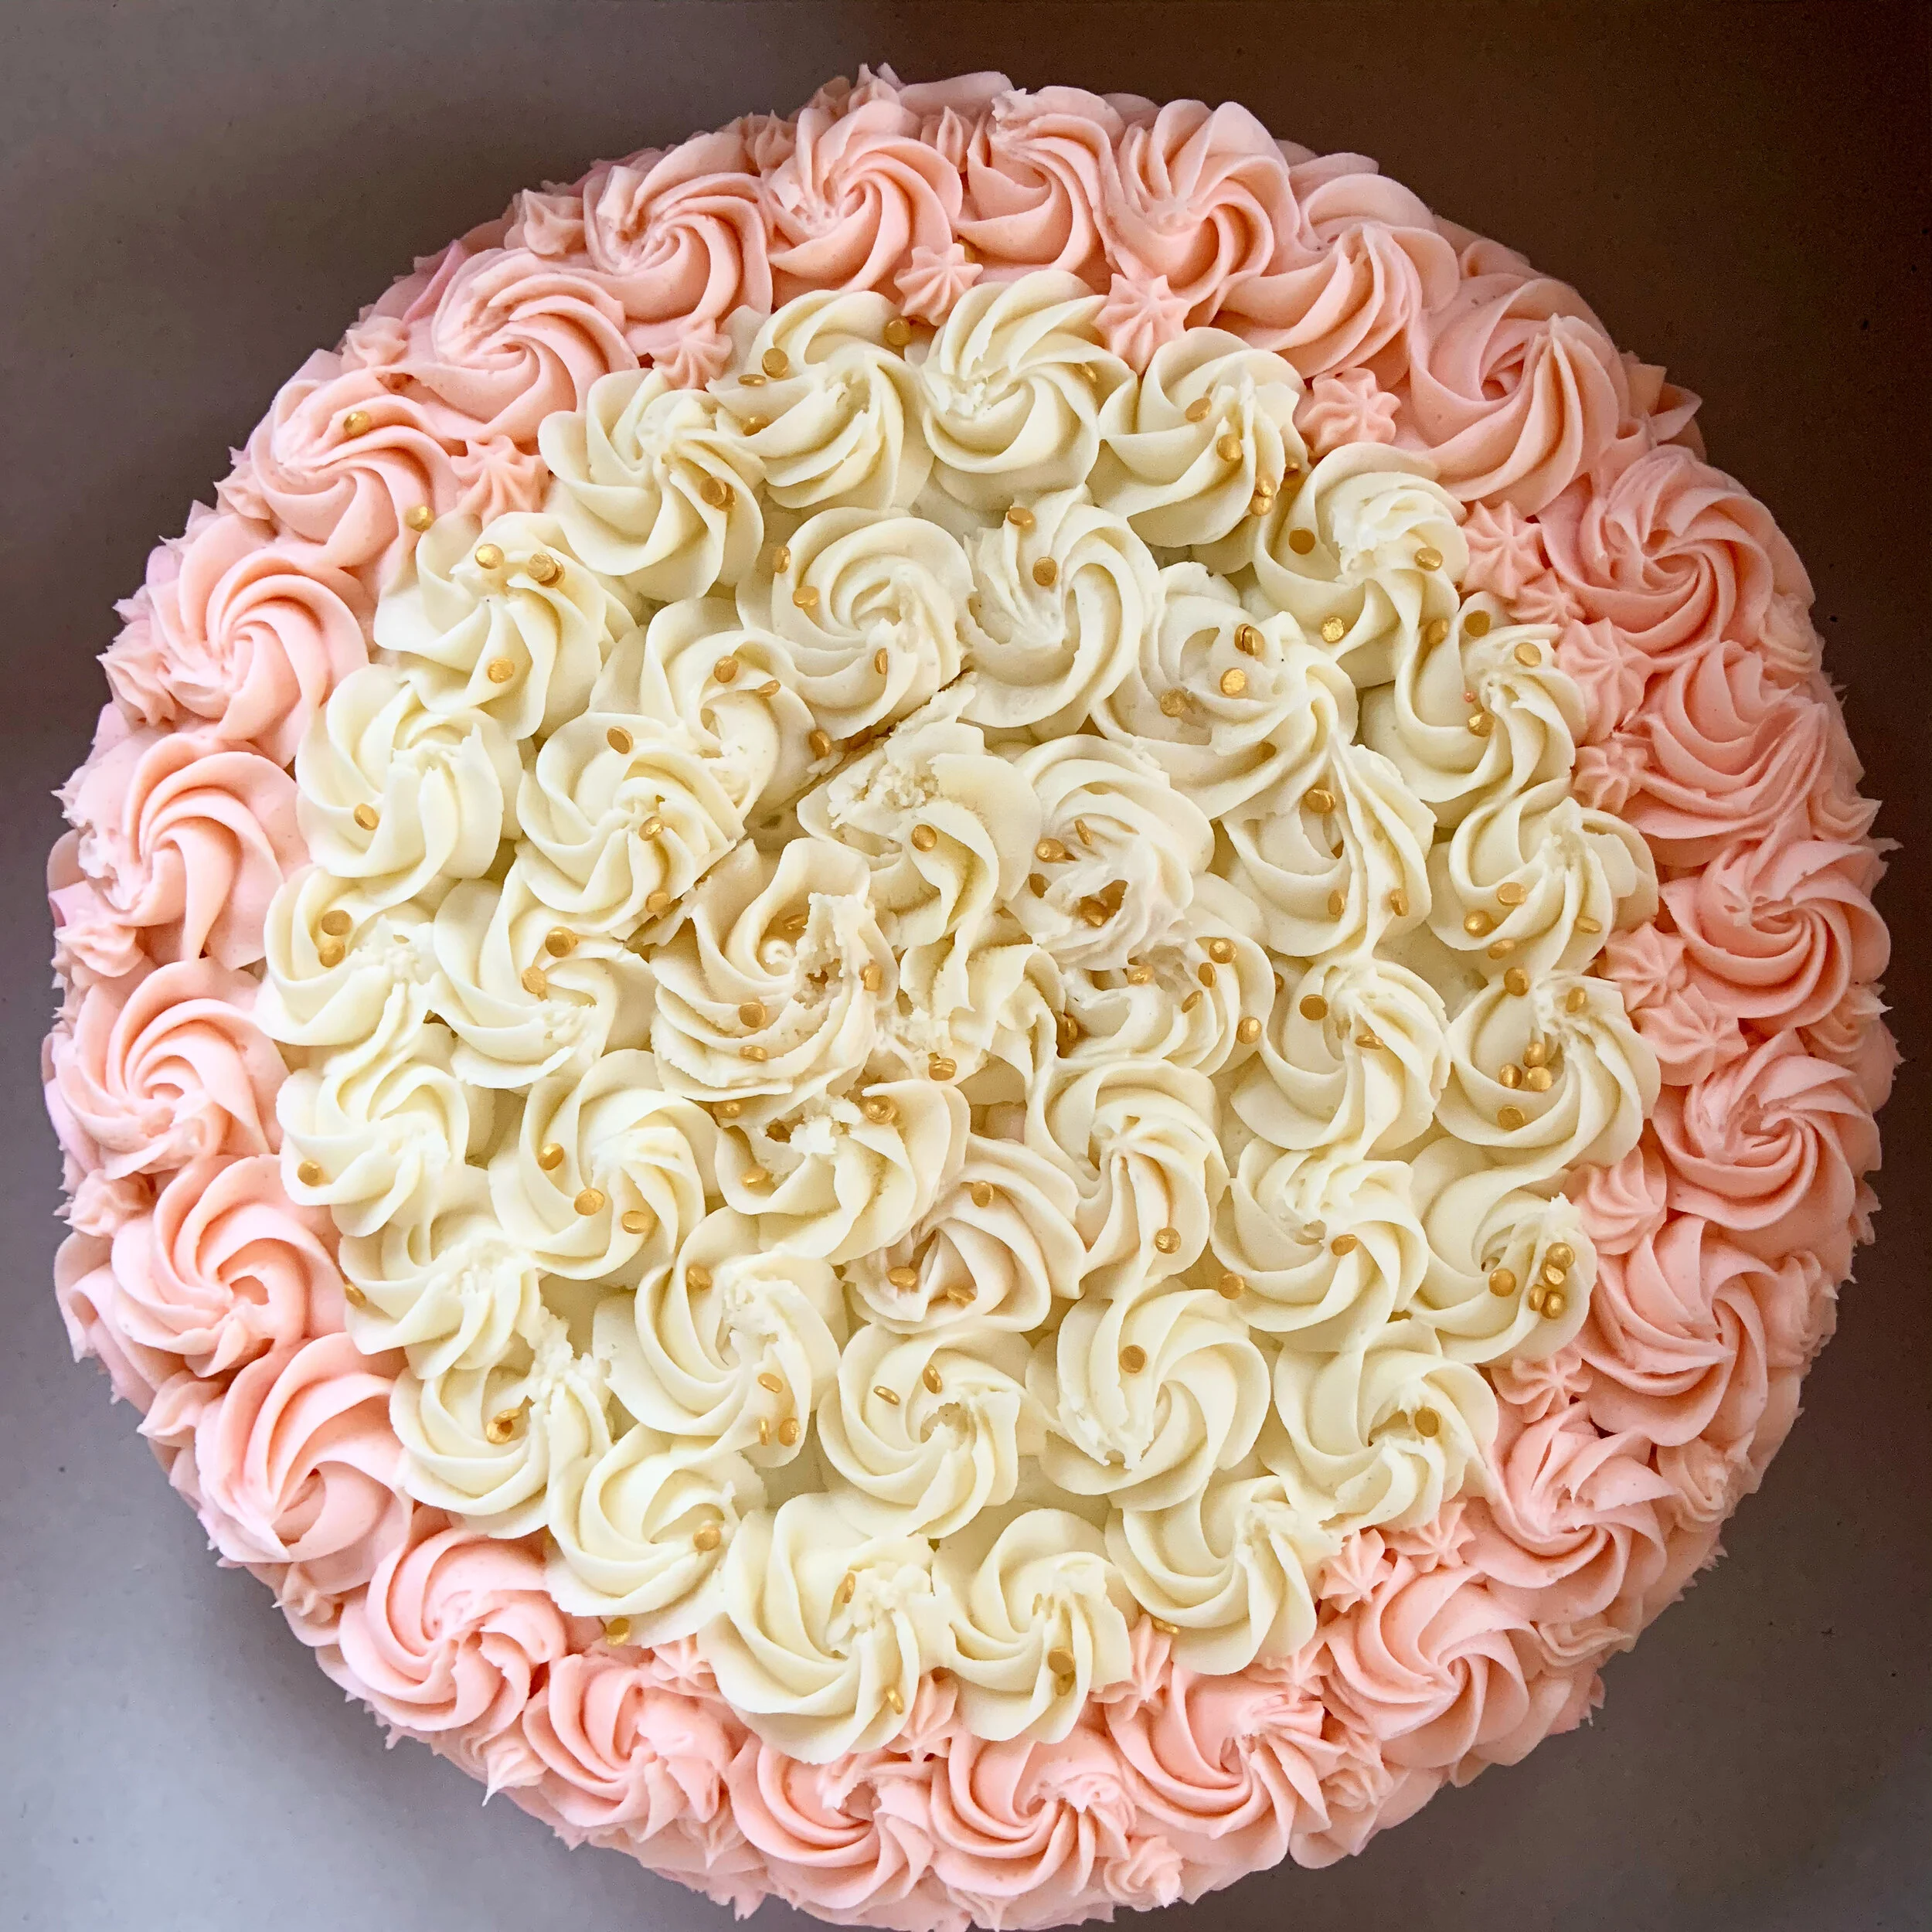
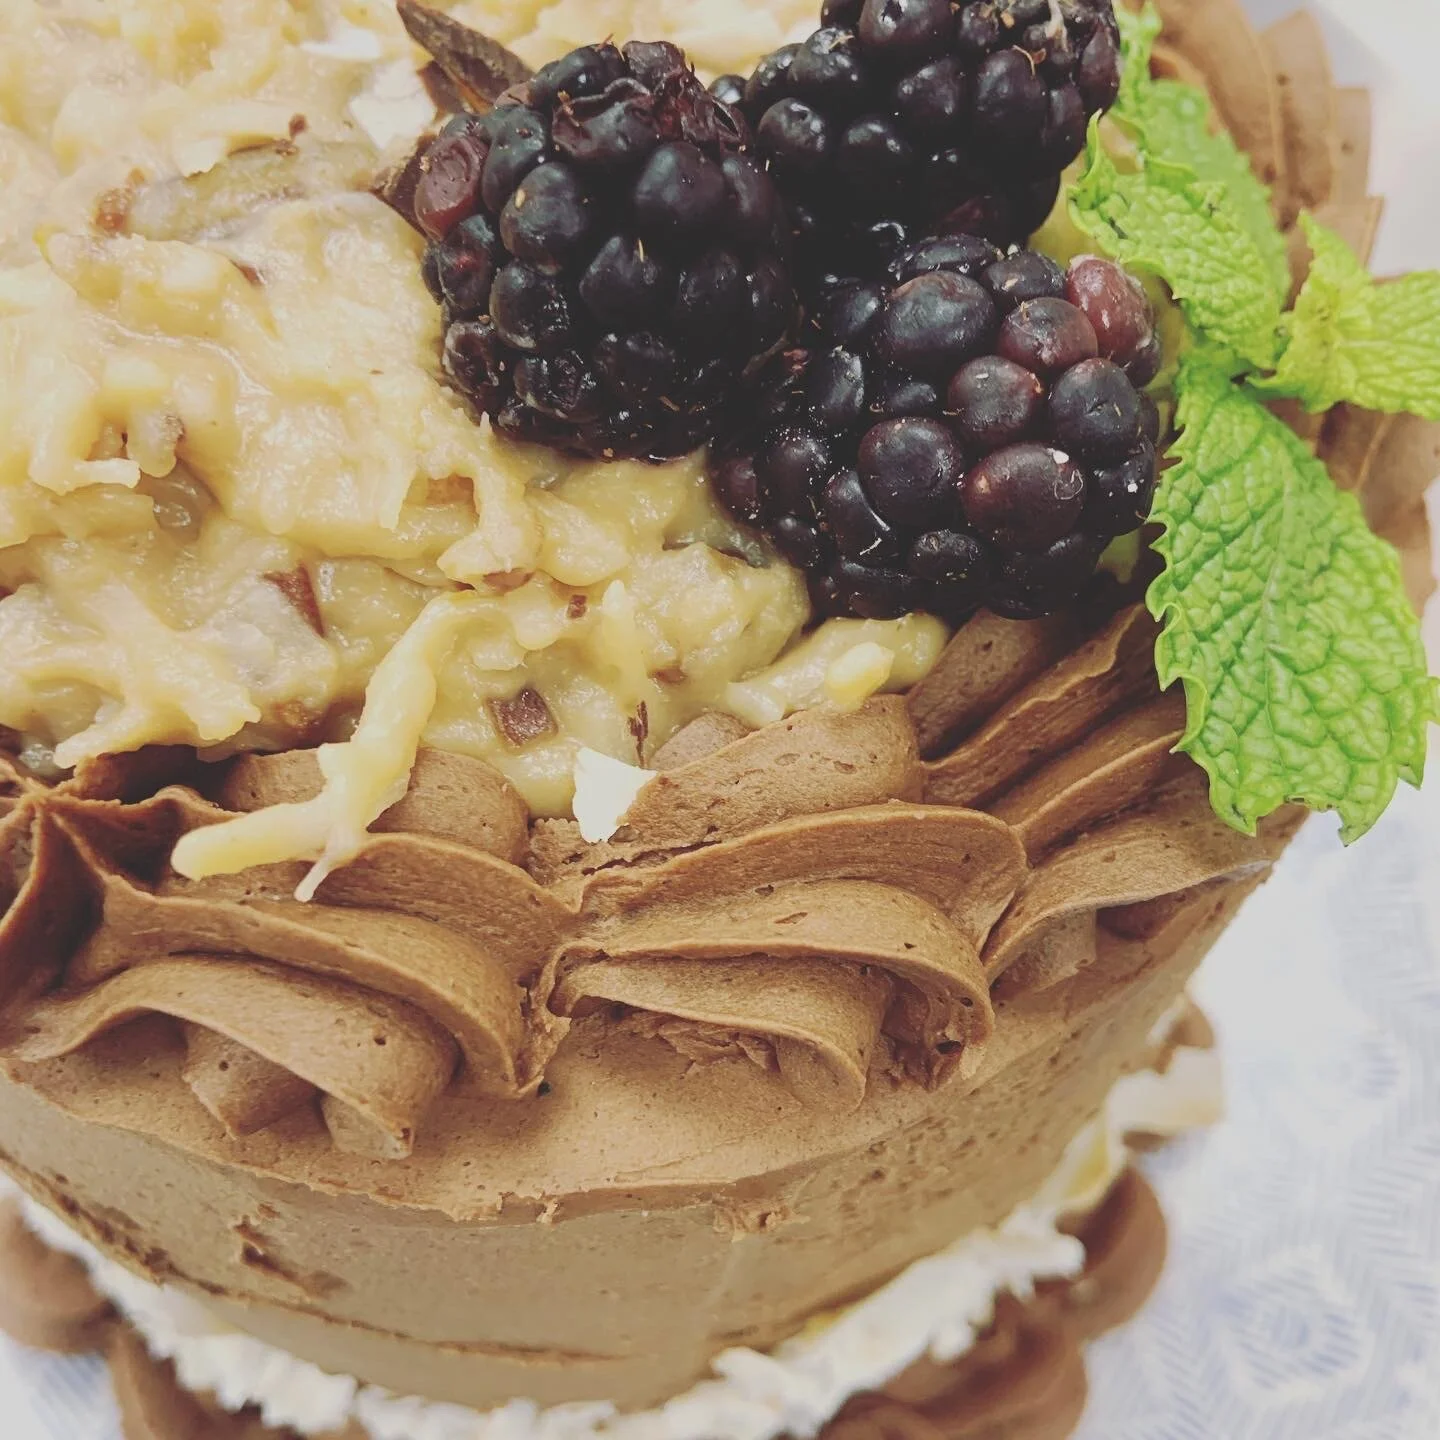
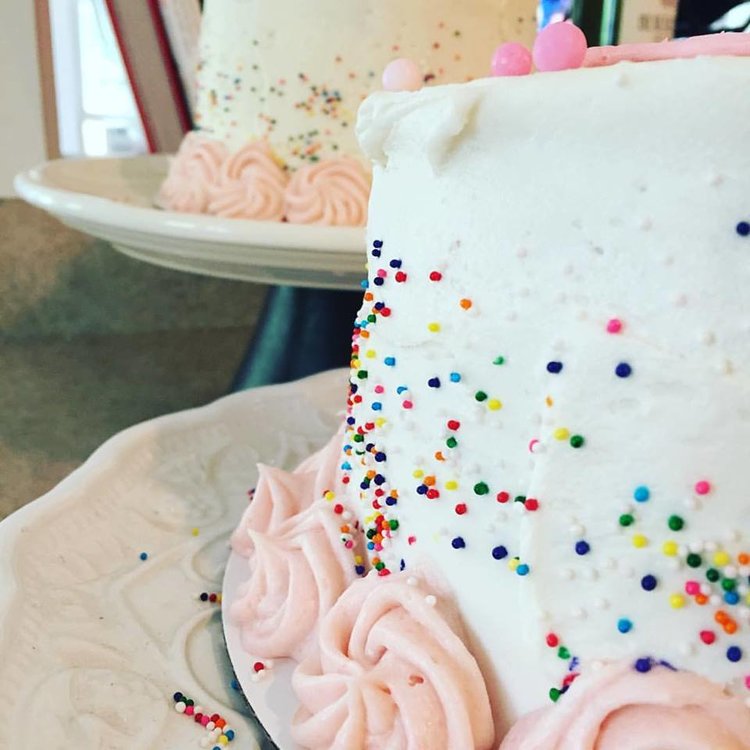
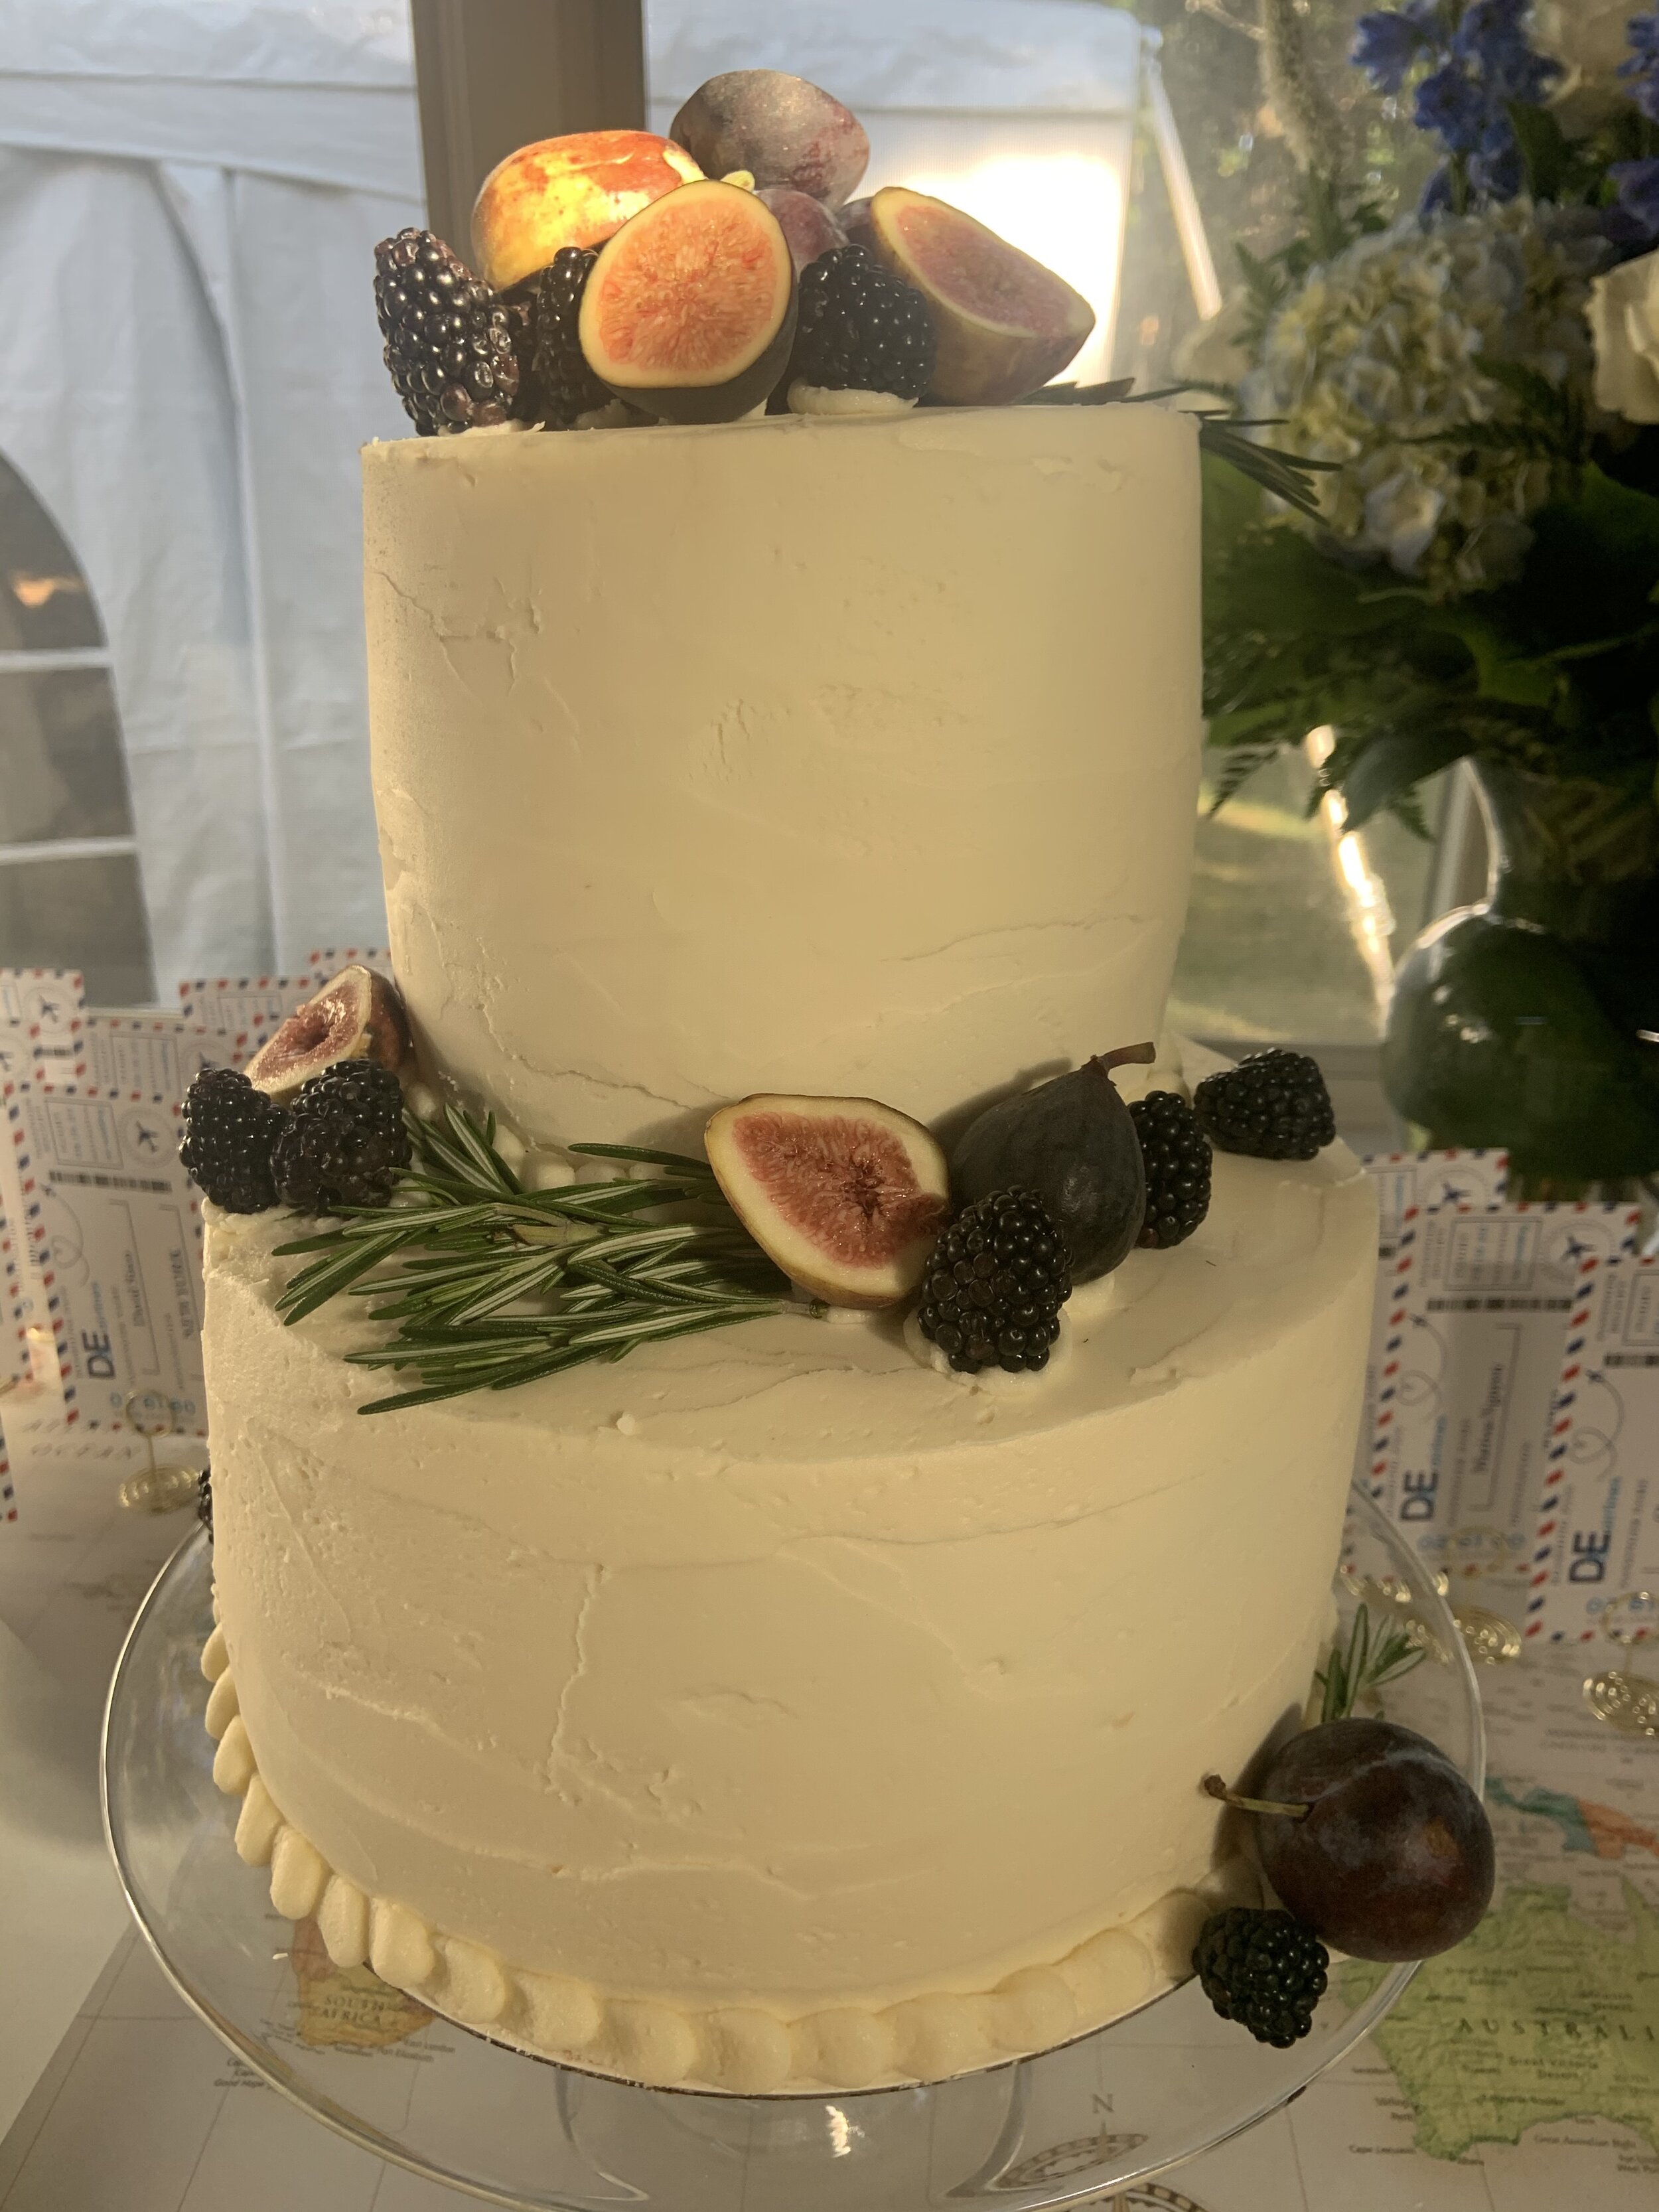
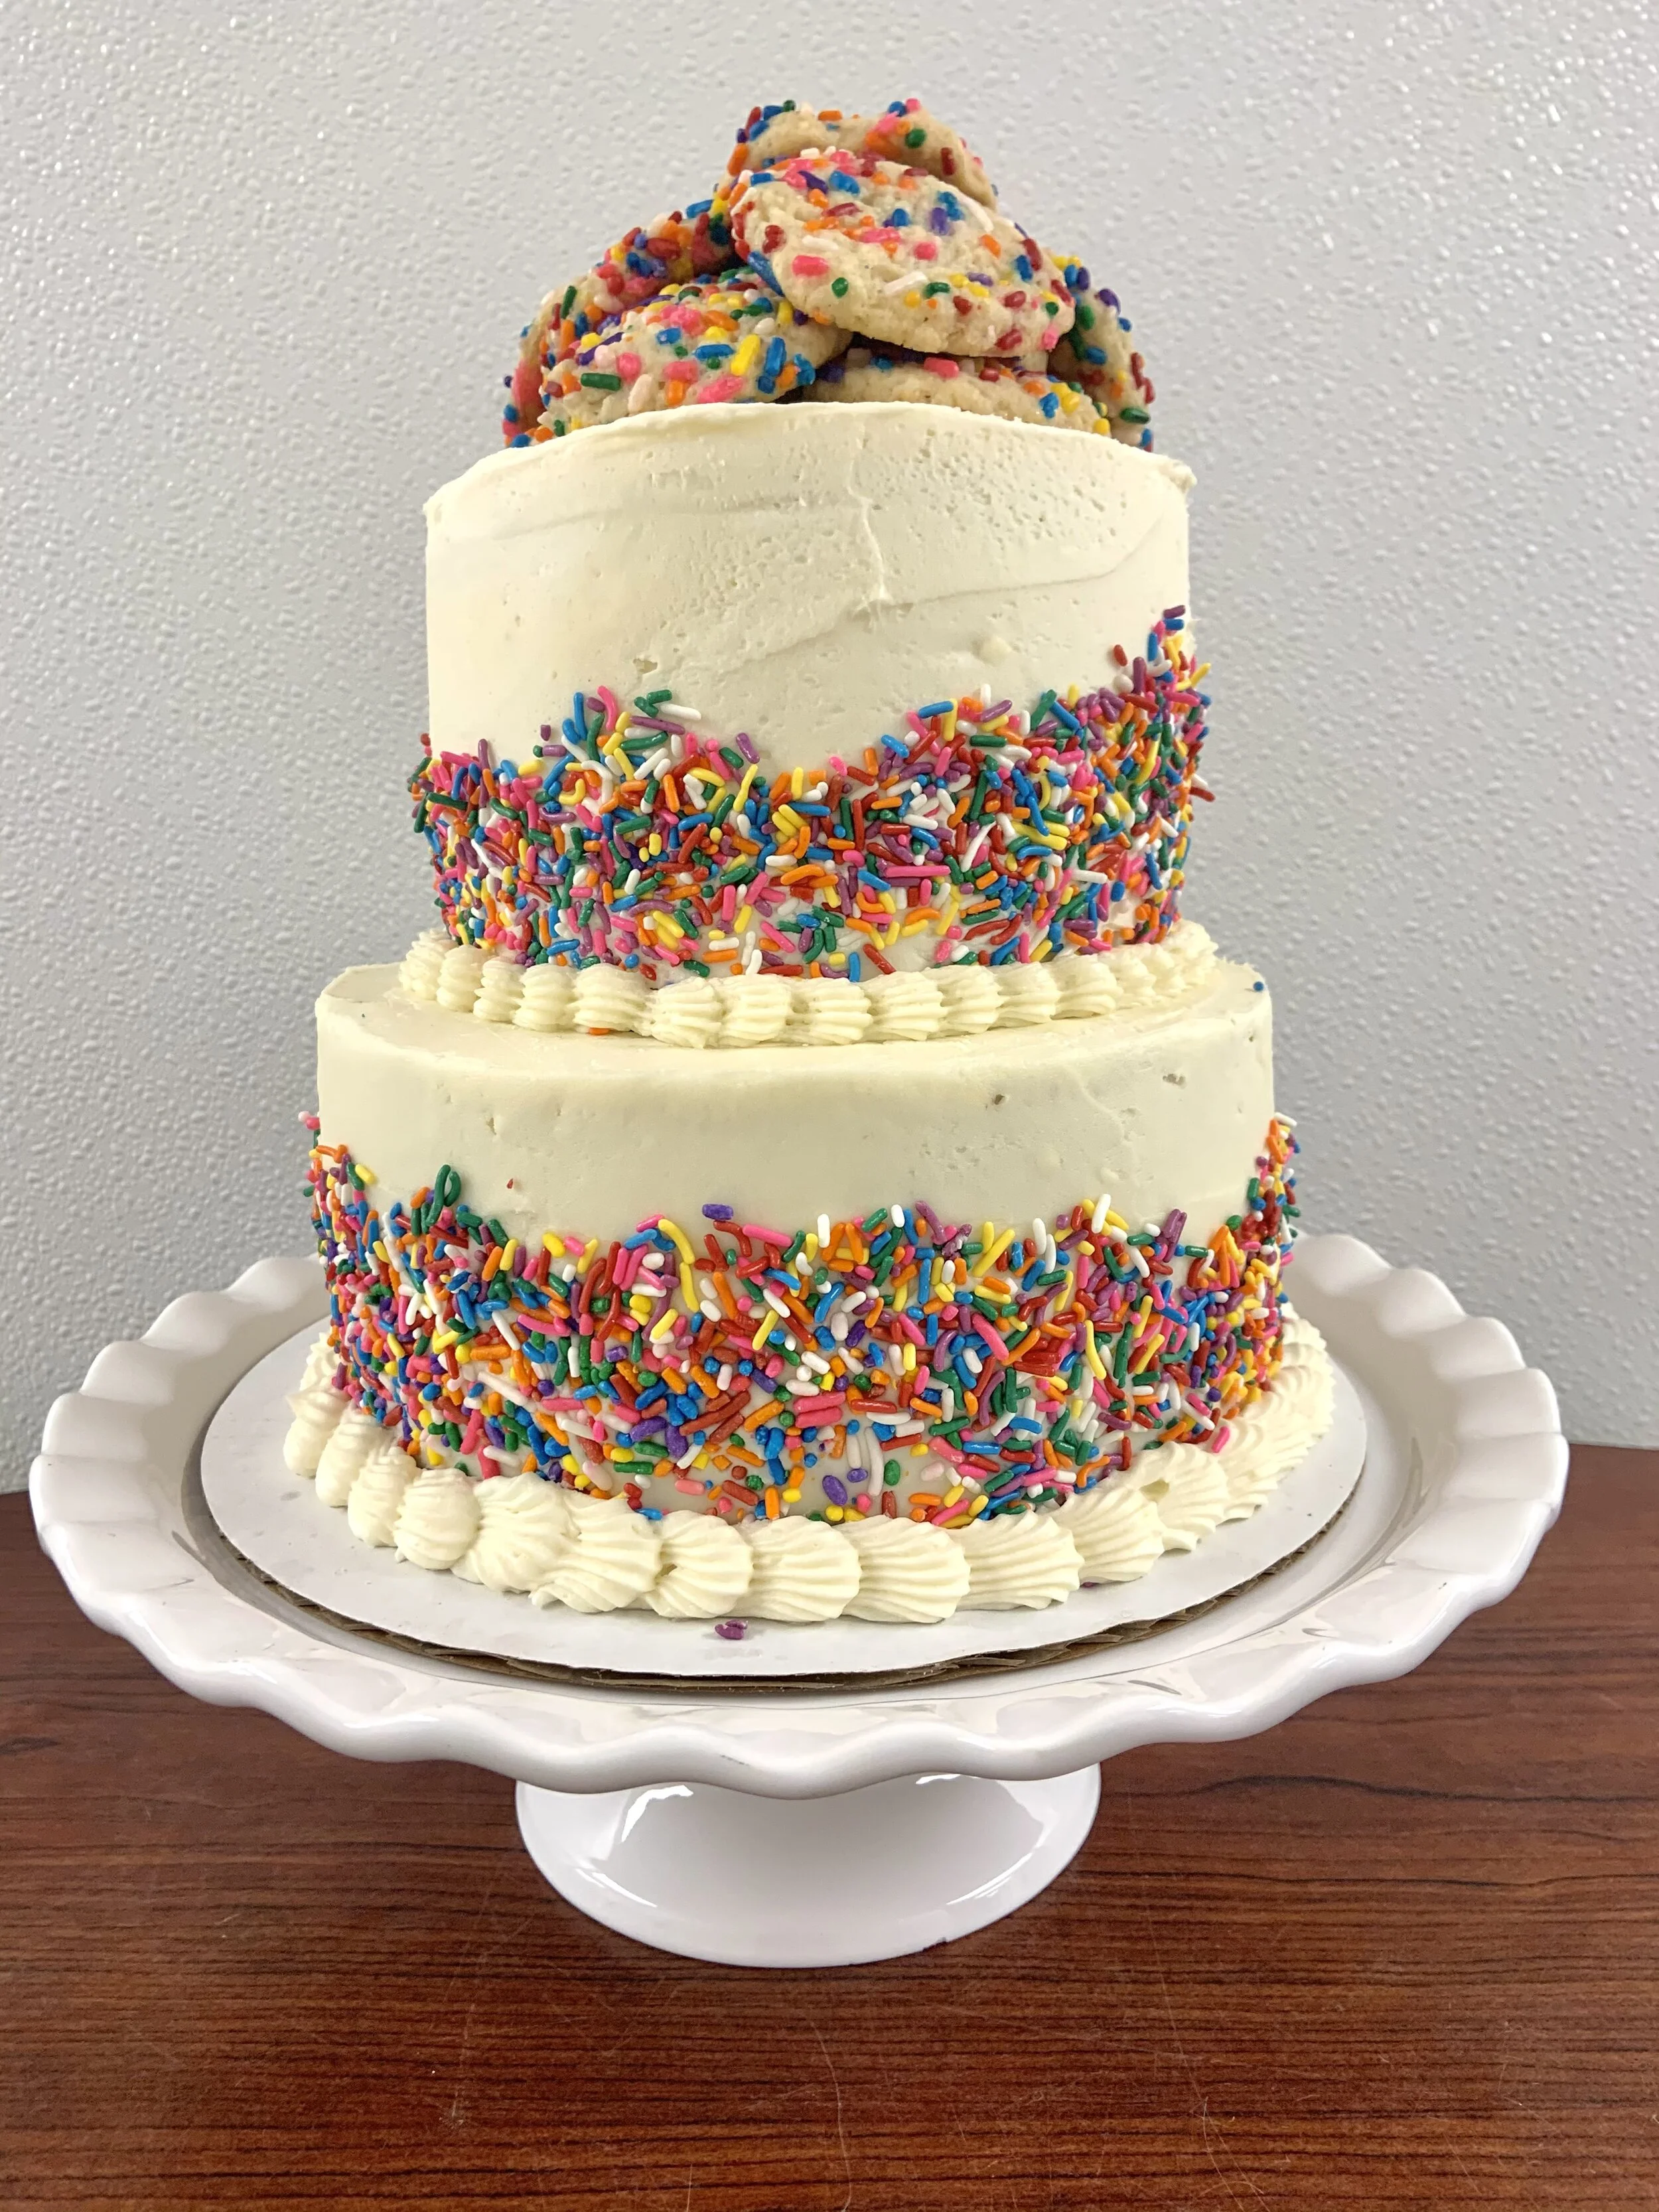
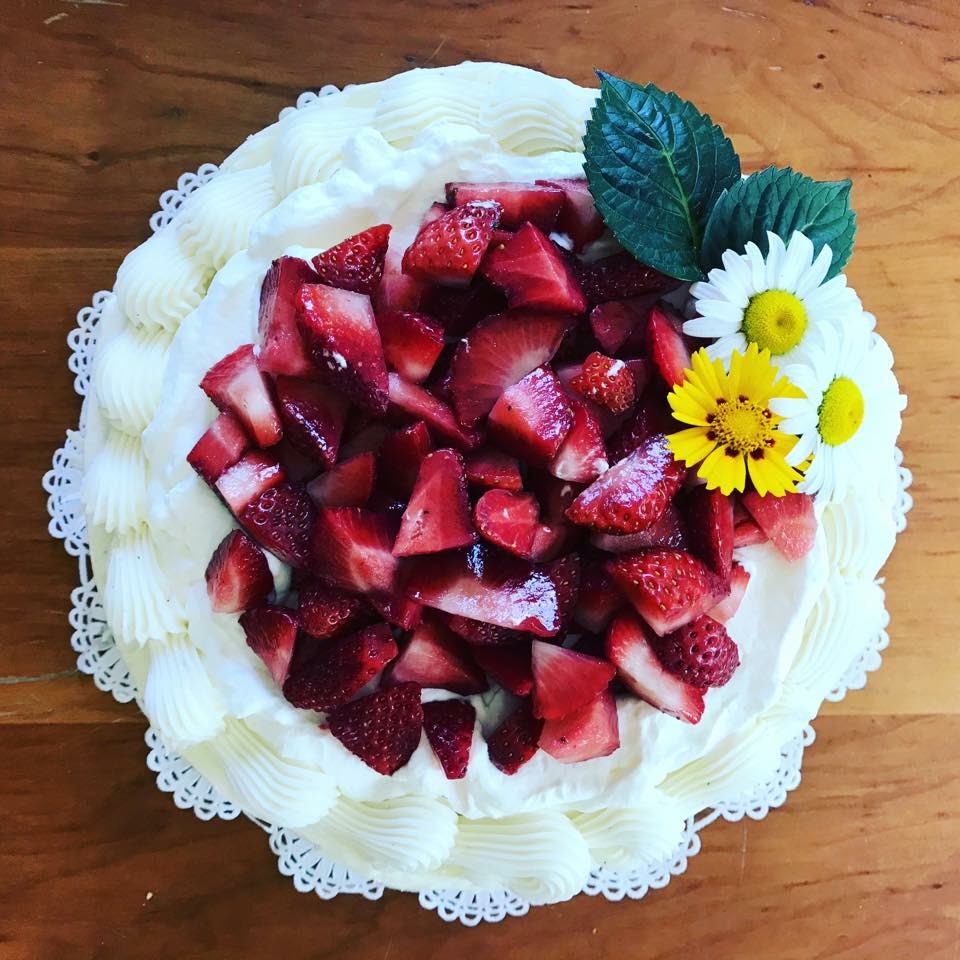
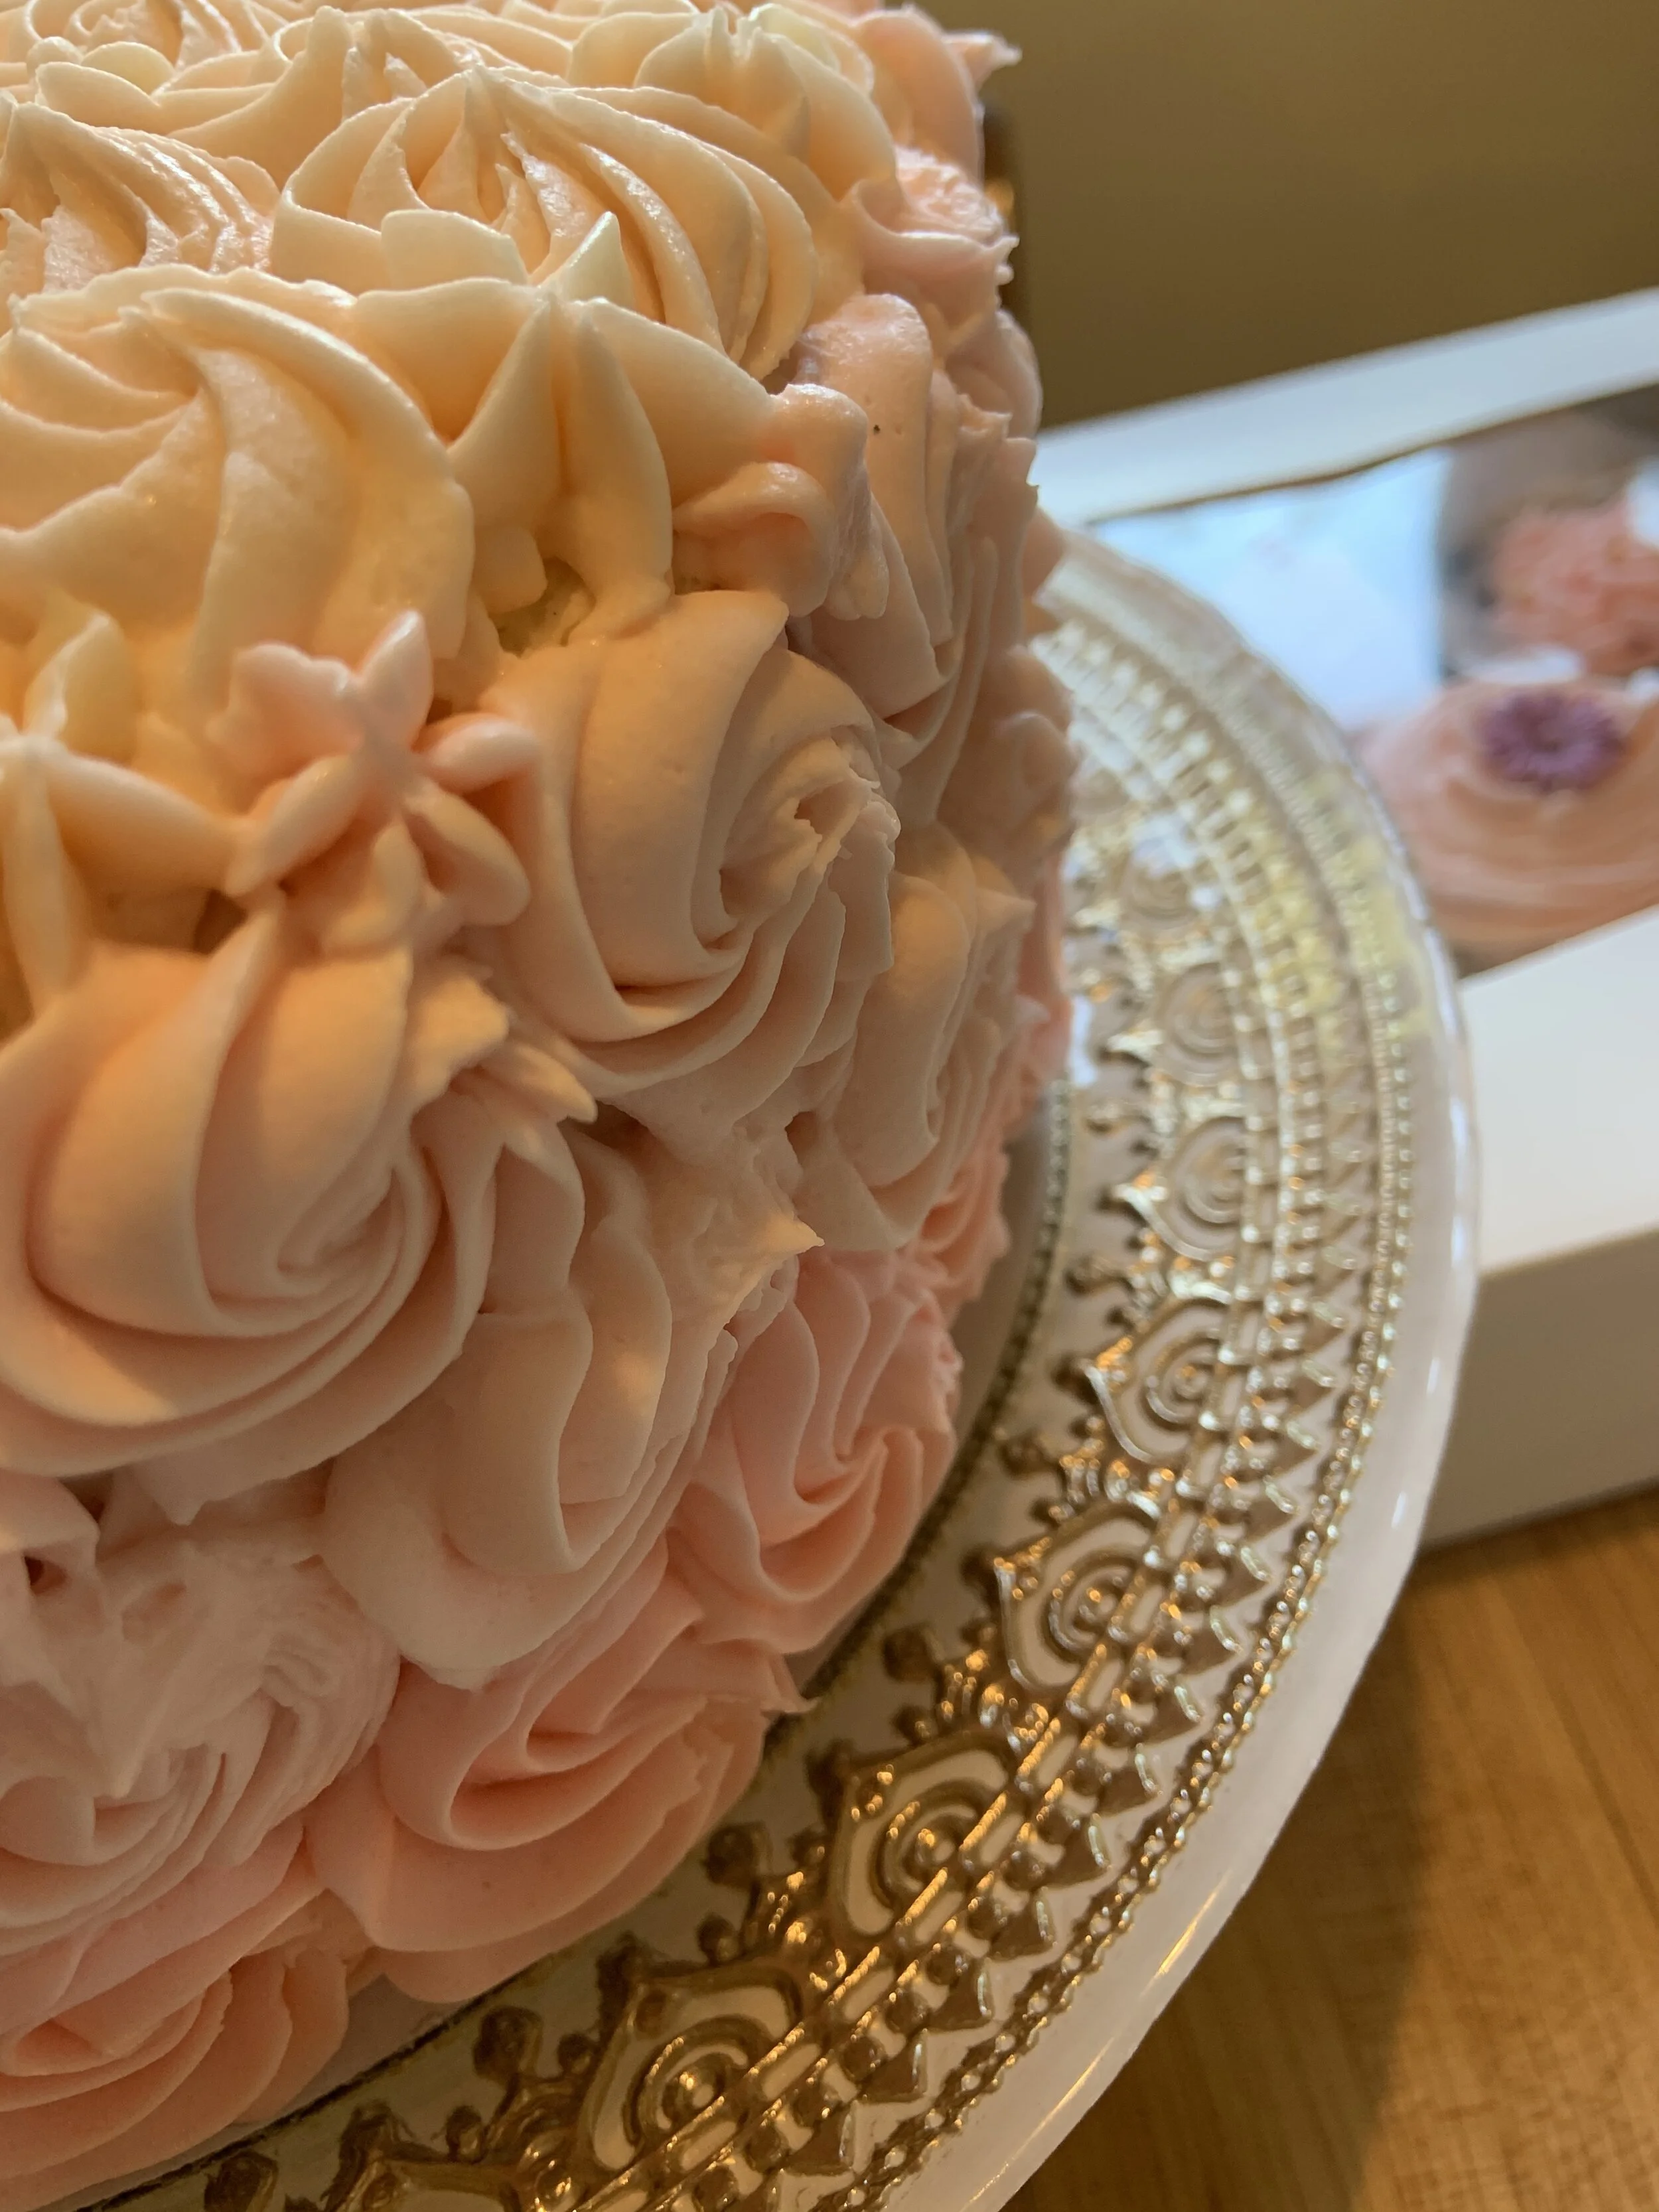
Birthday cakes
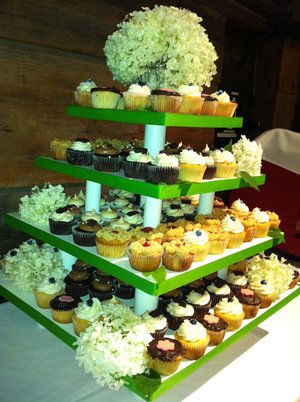
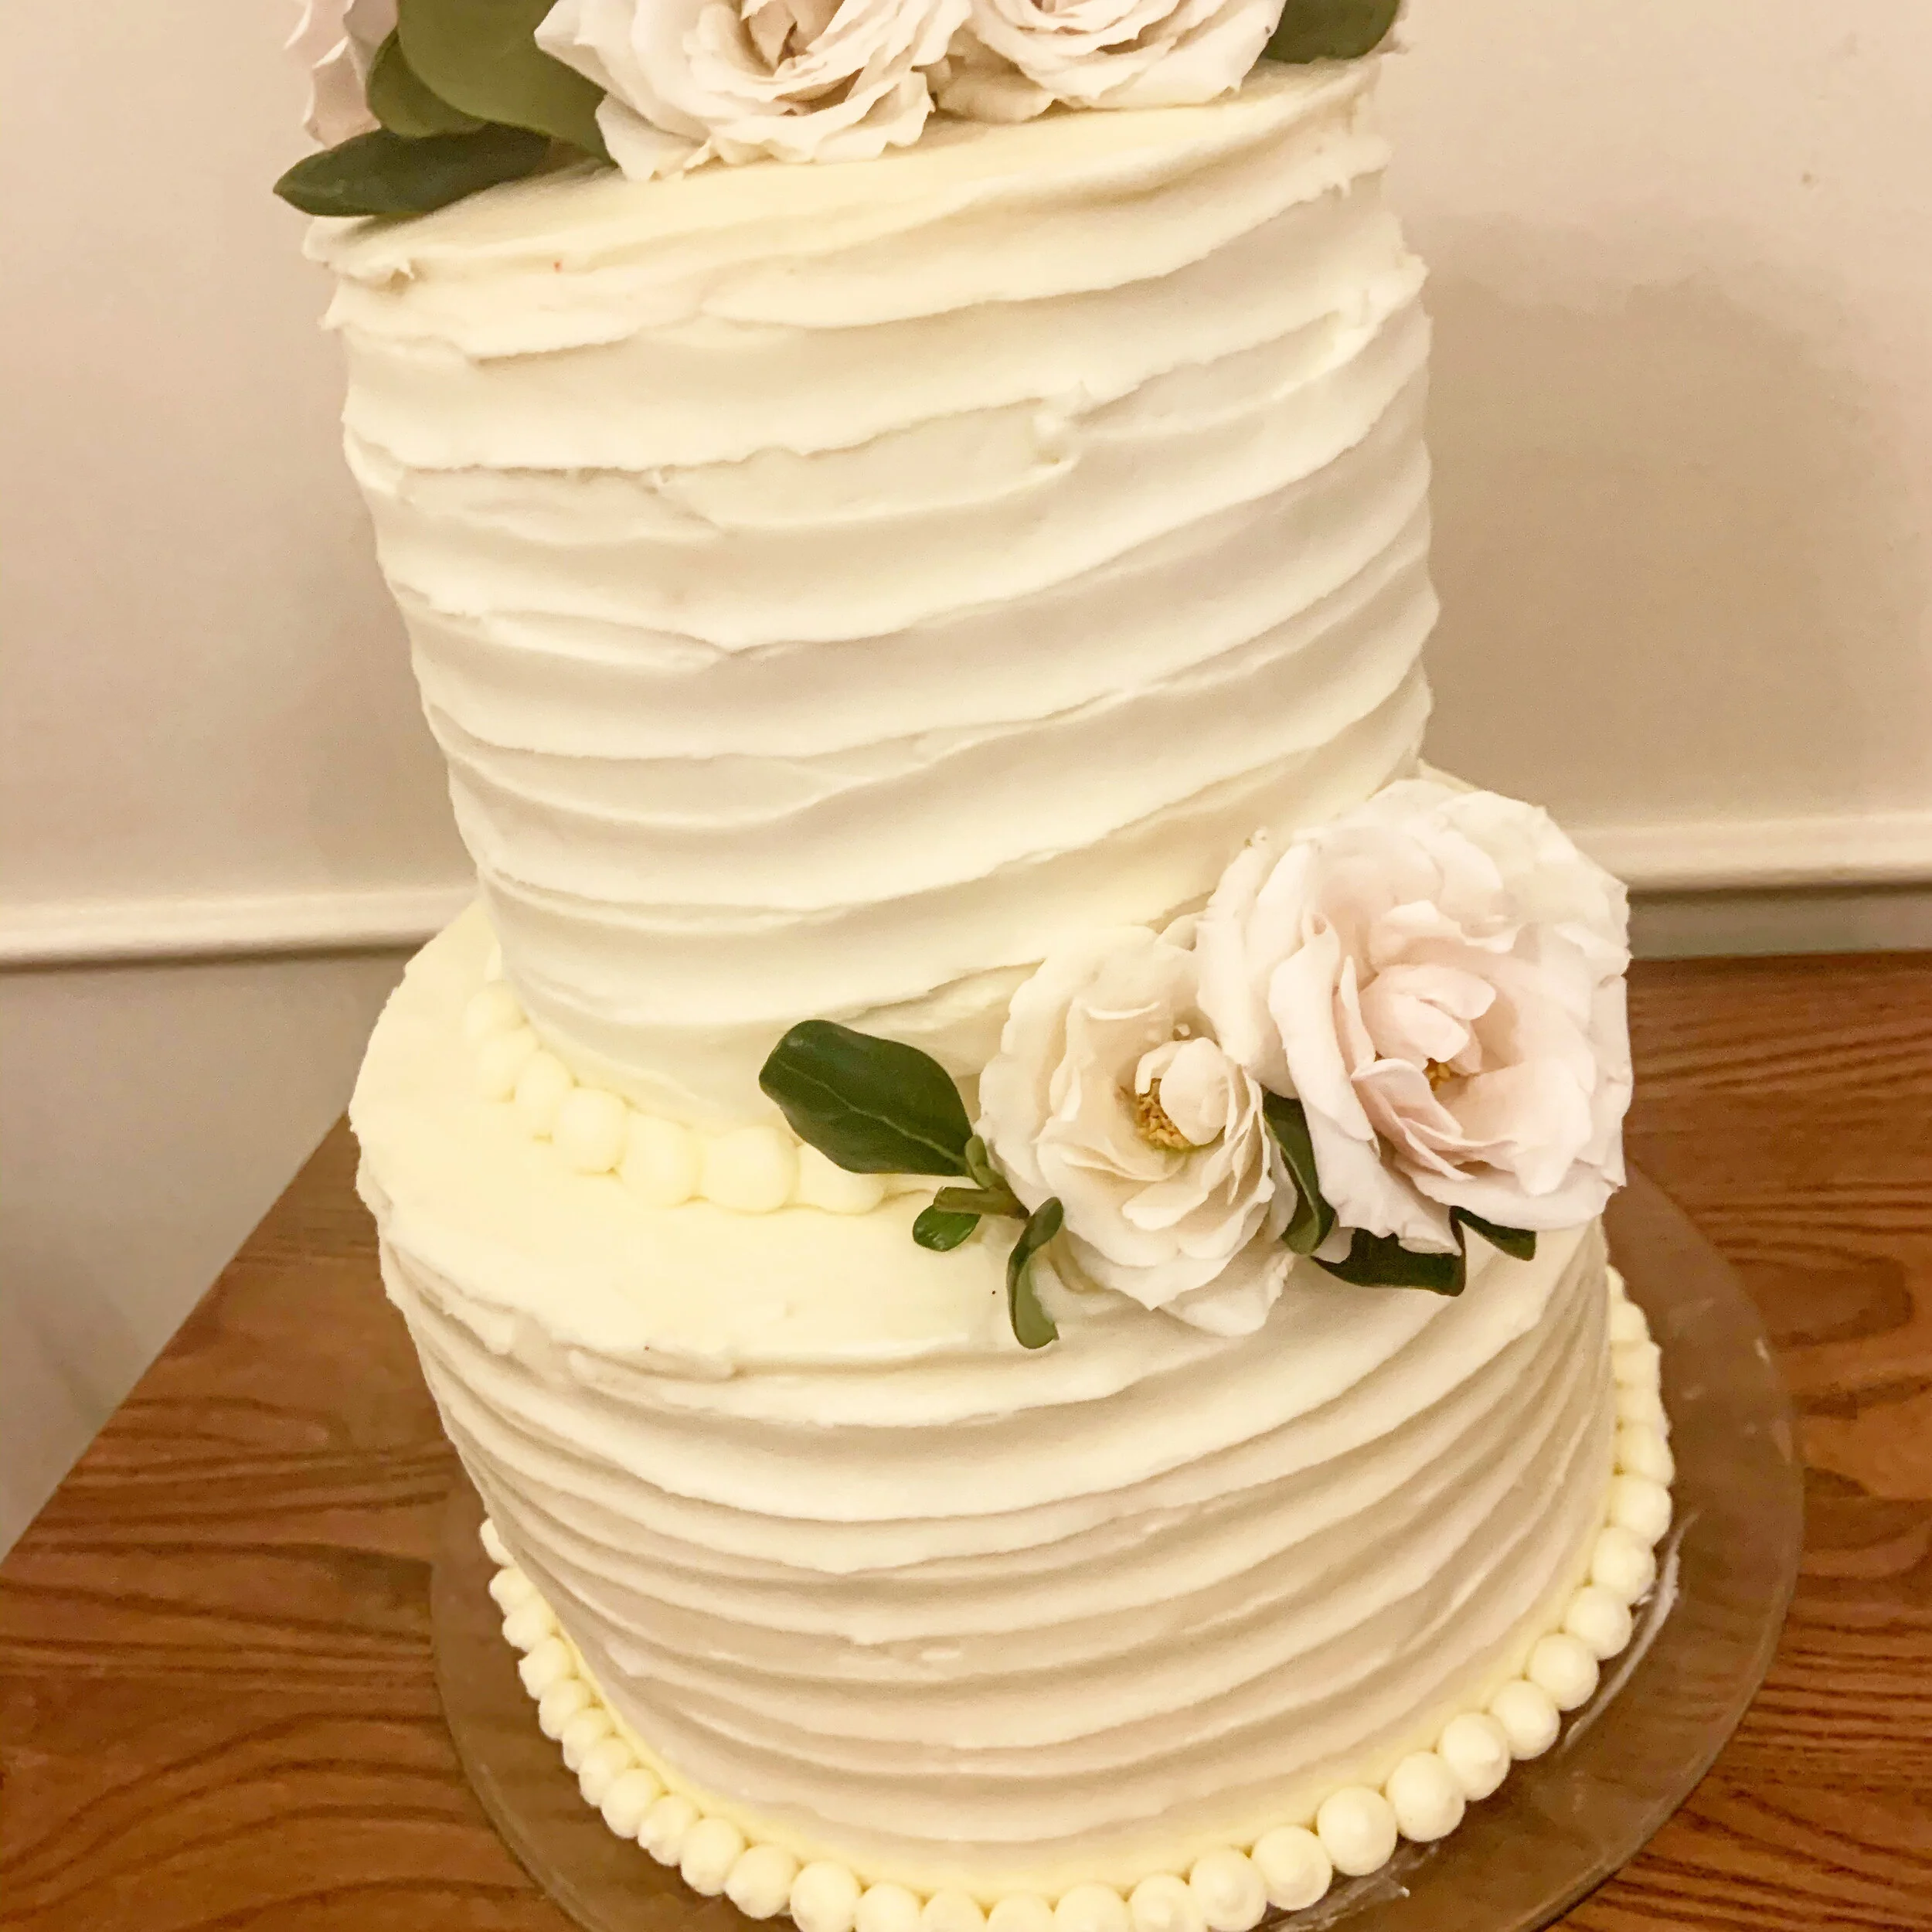
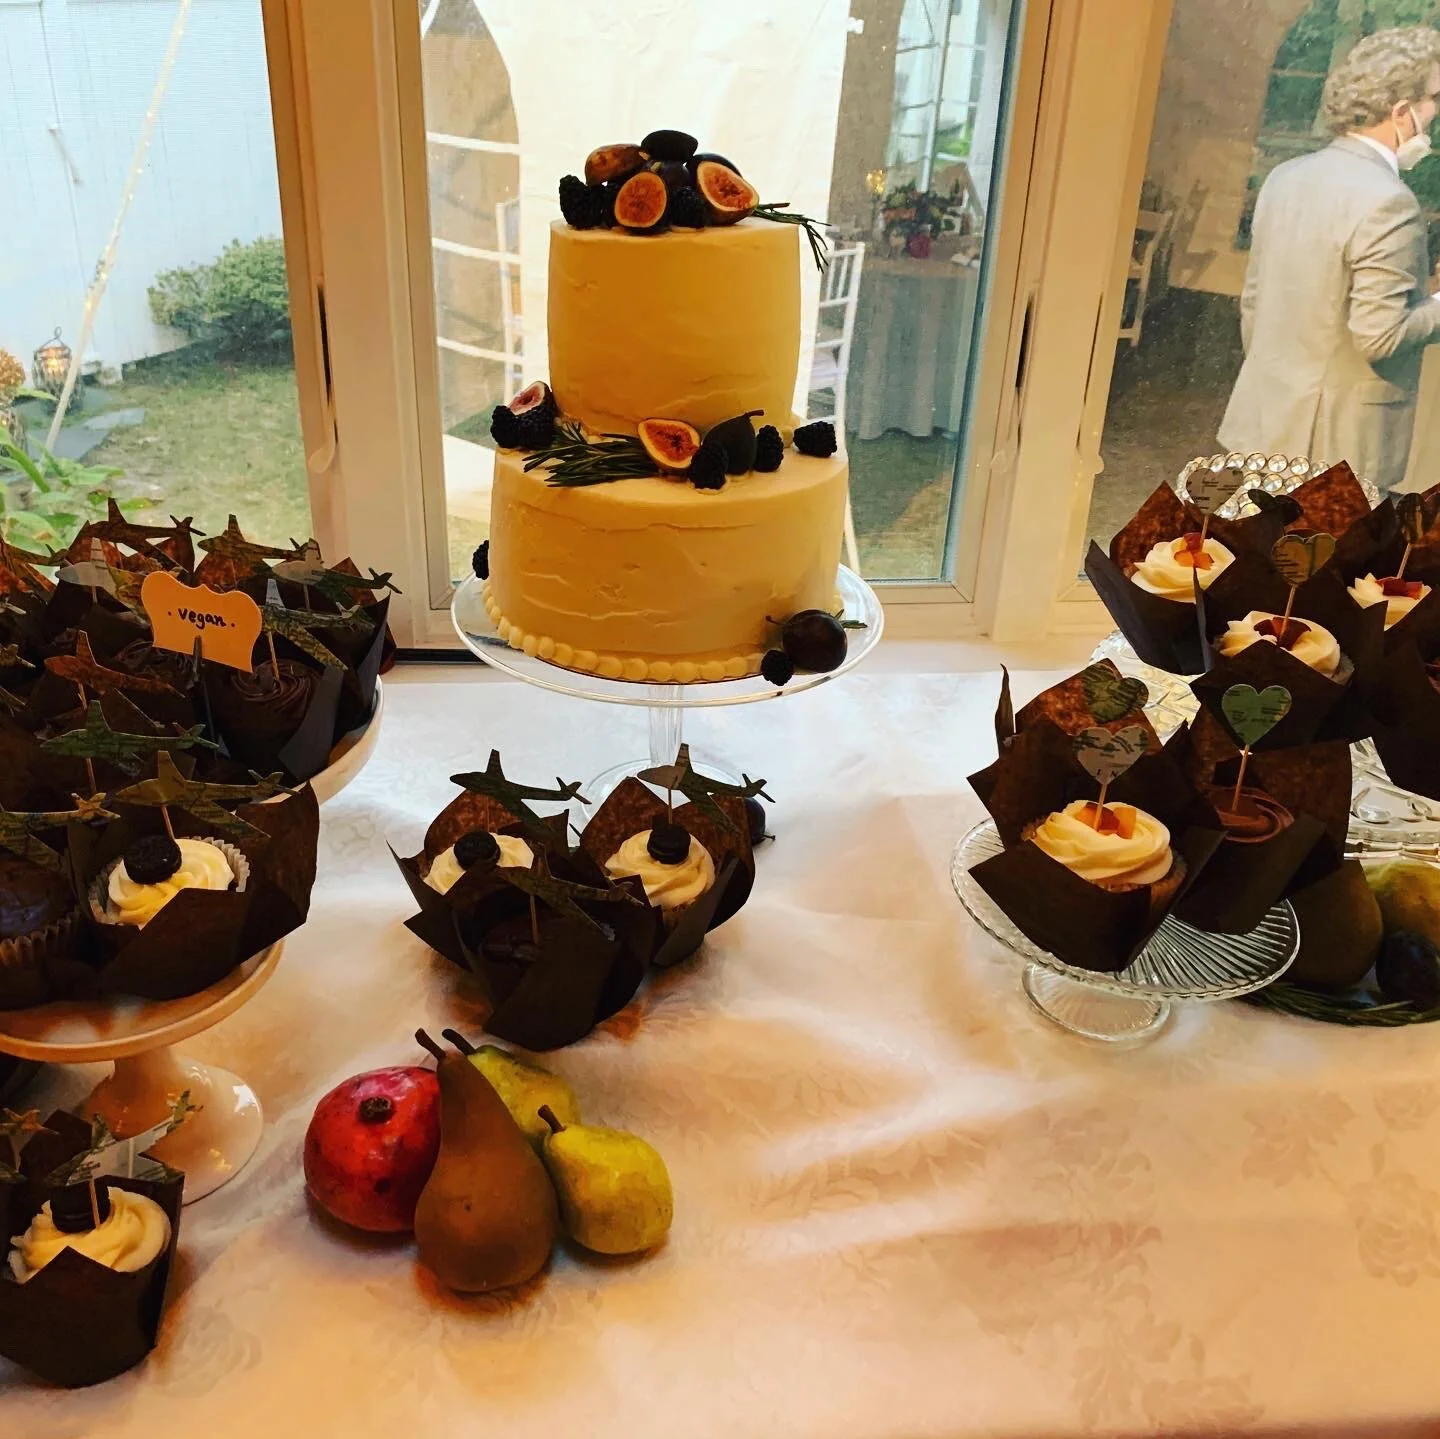
Wedding cupcake/cake displays
Dessert tables
Home-cooked weeknight meals
Holiday side dishes
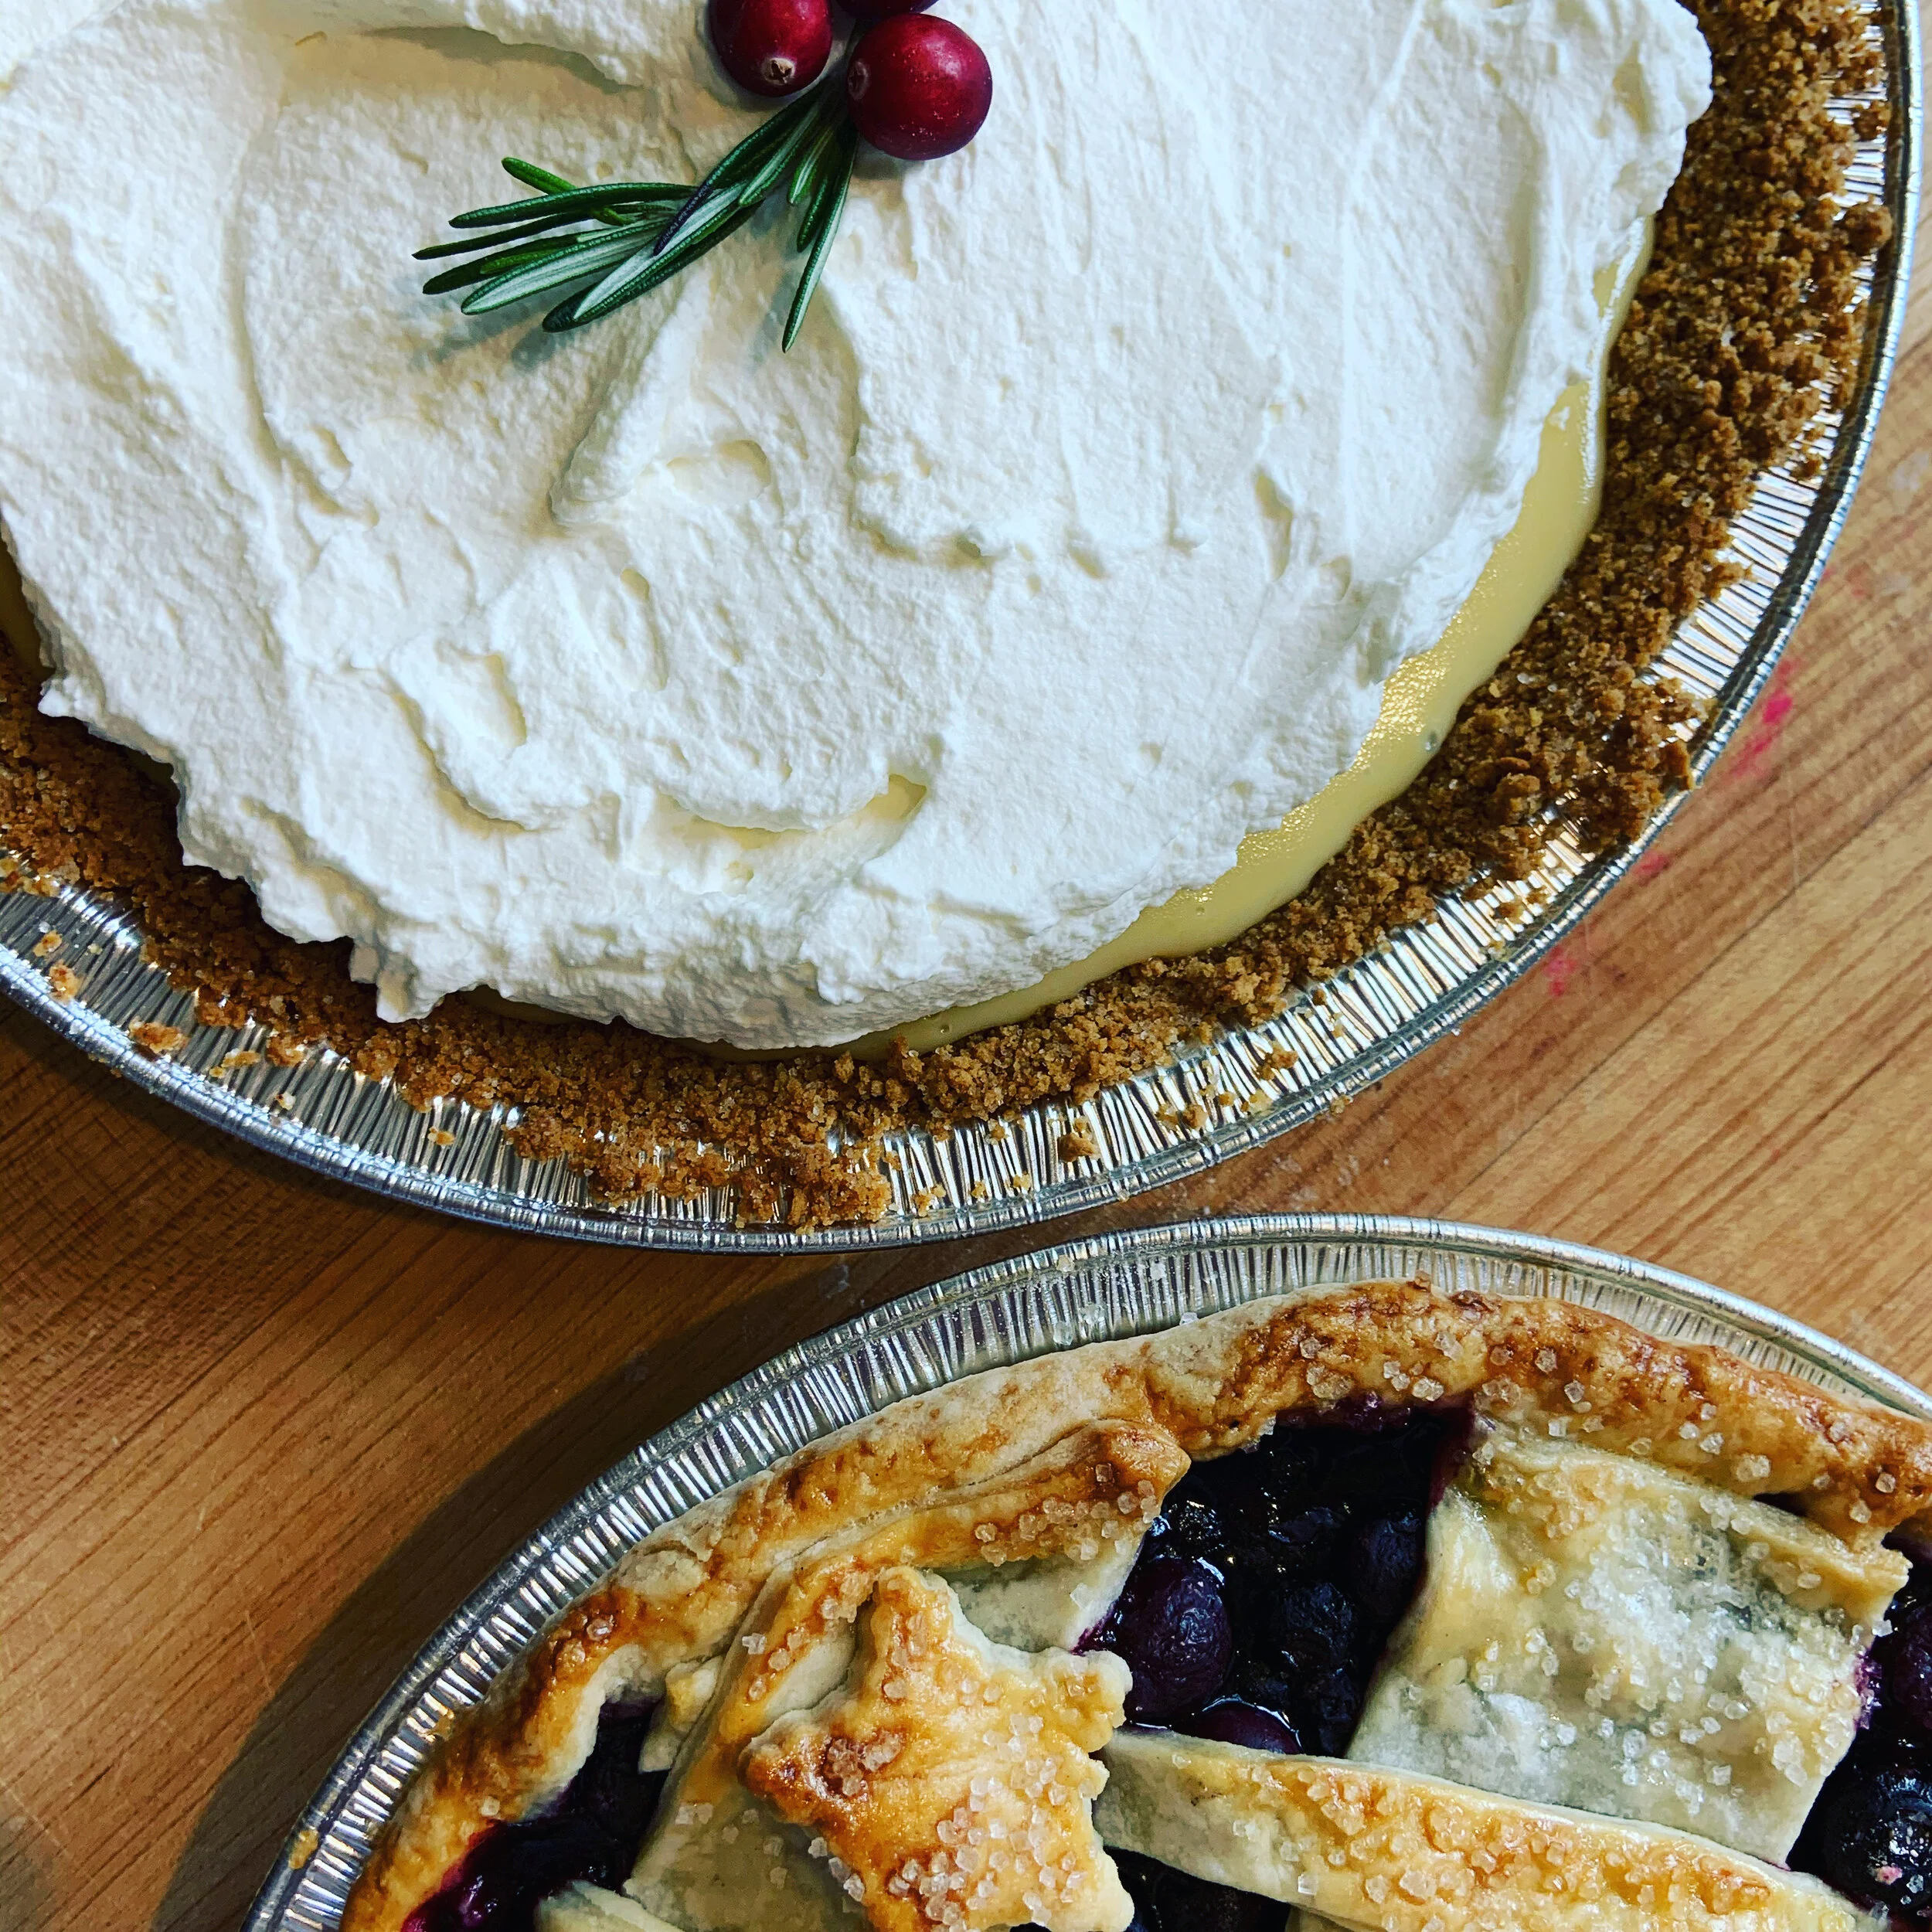
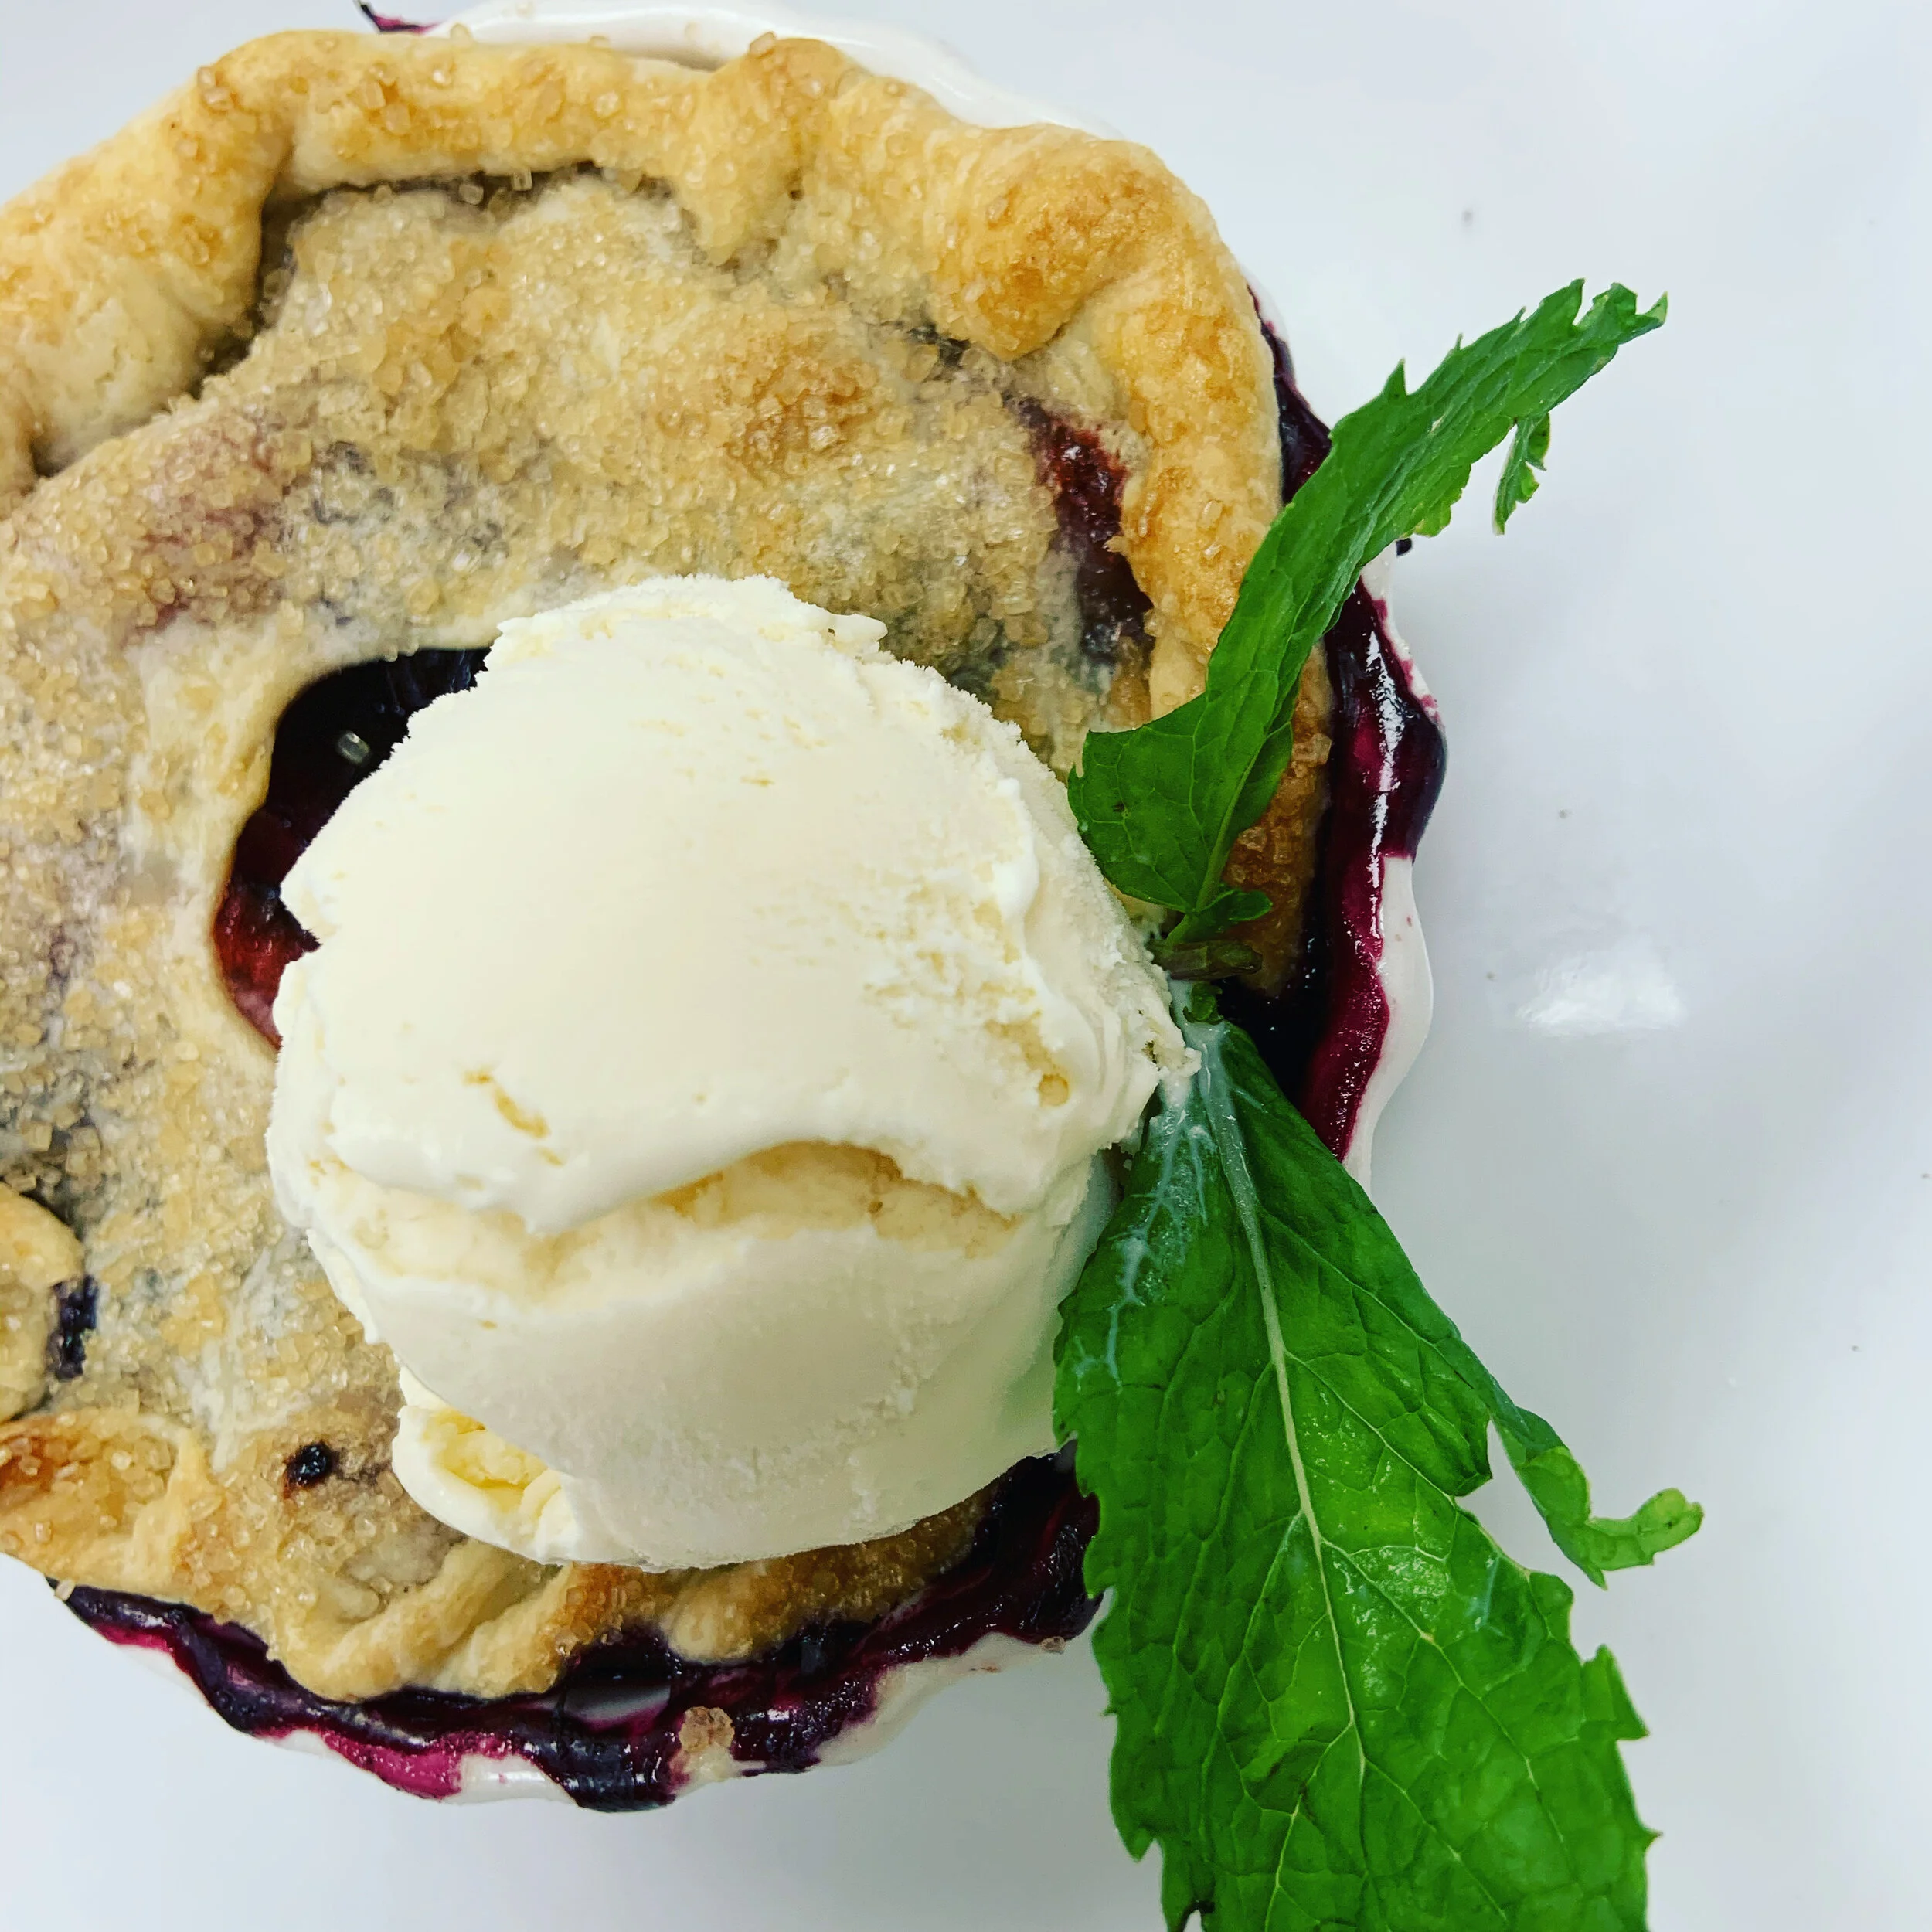
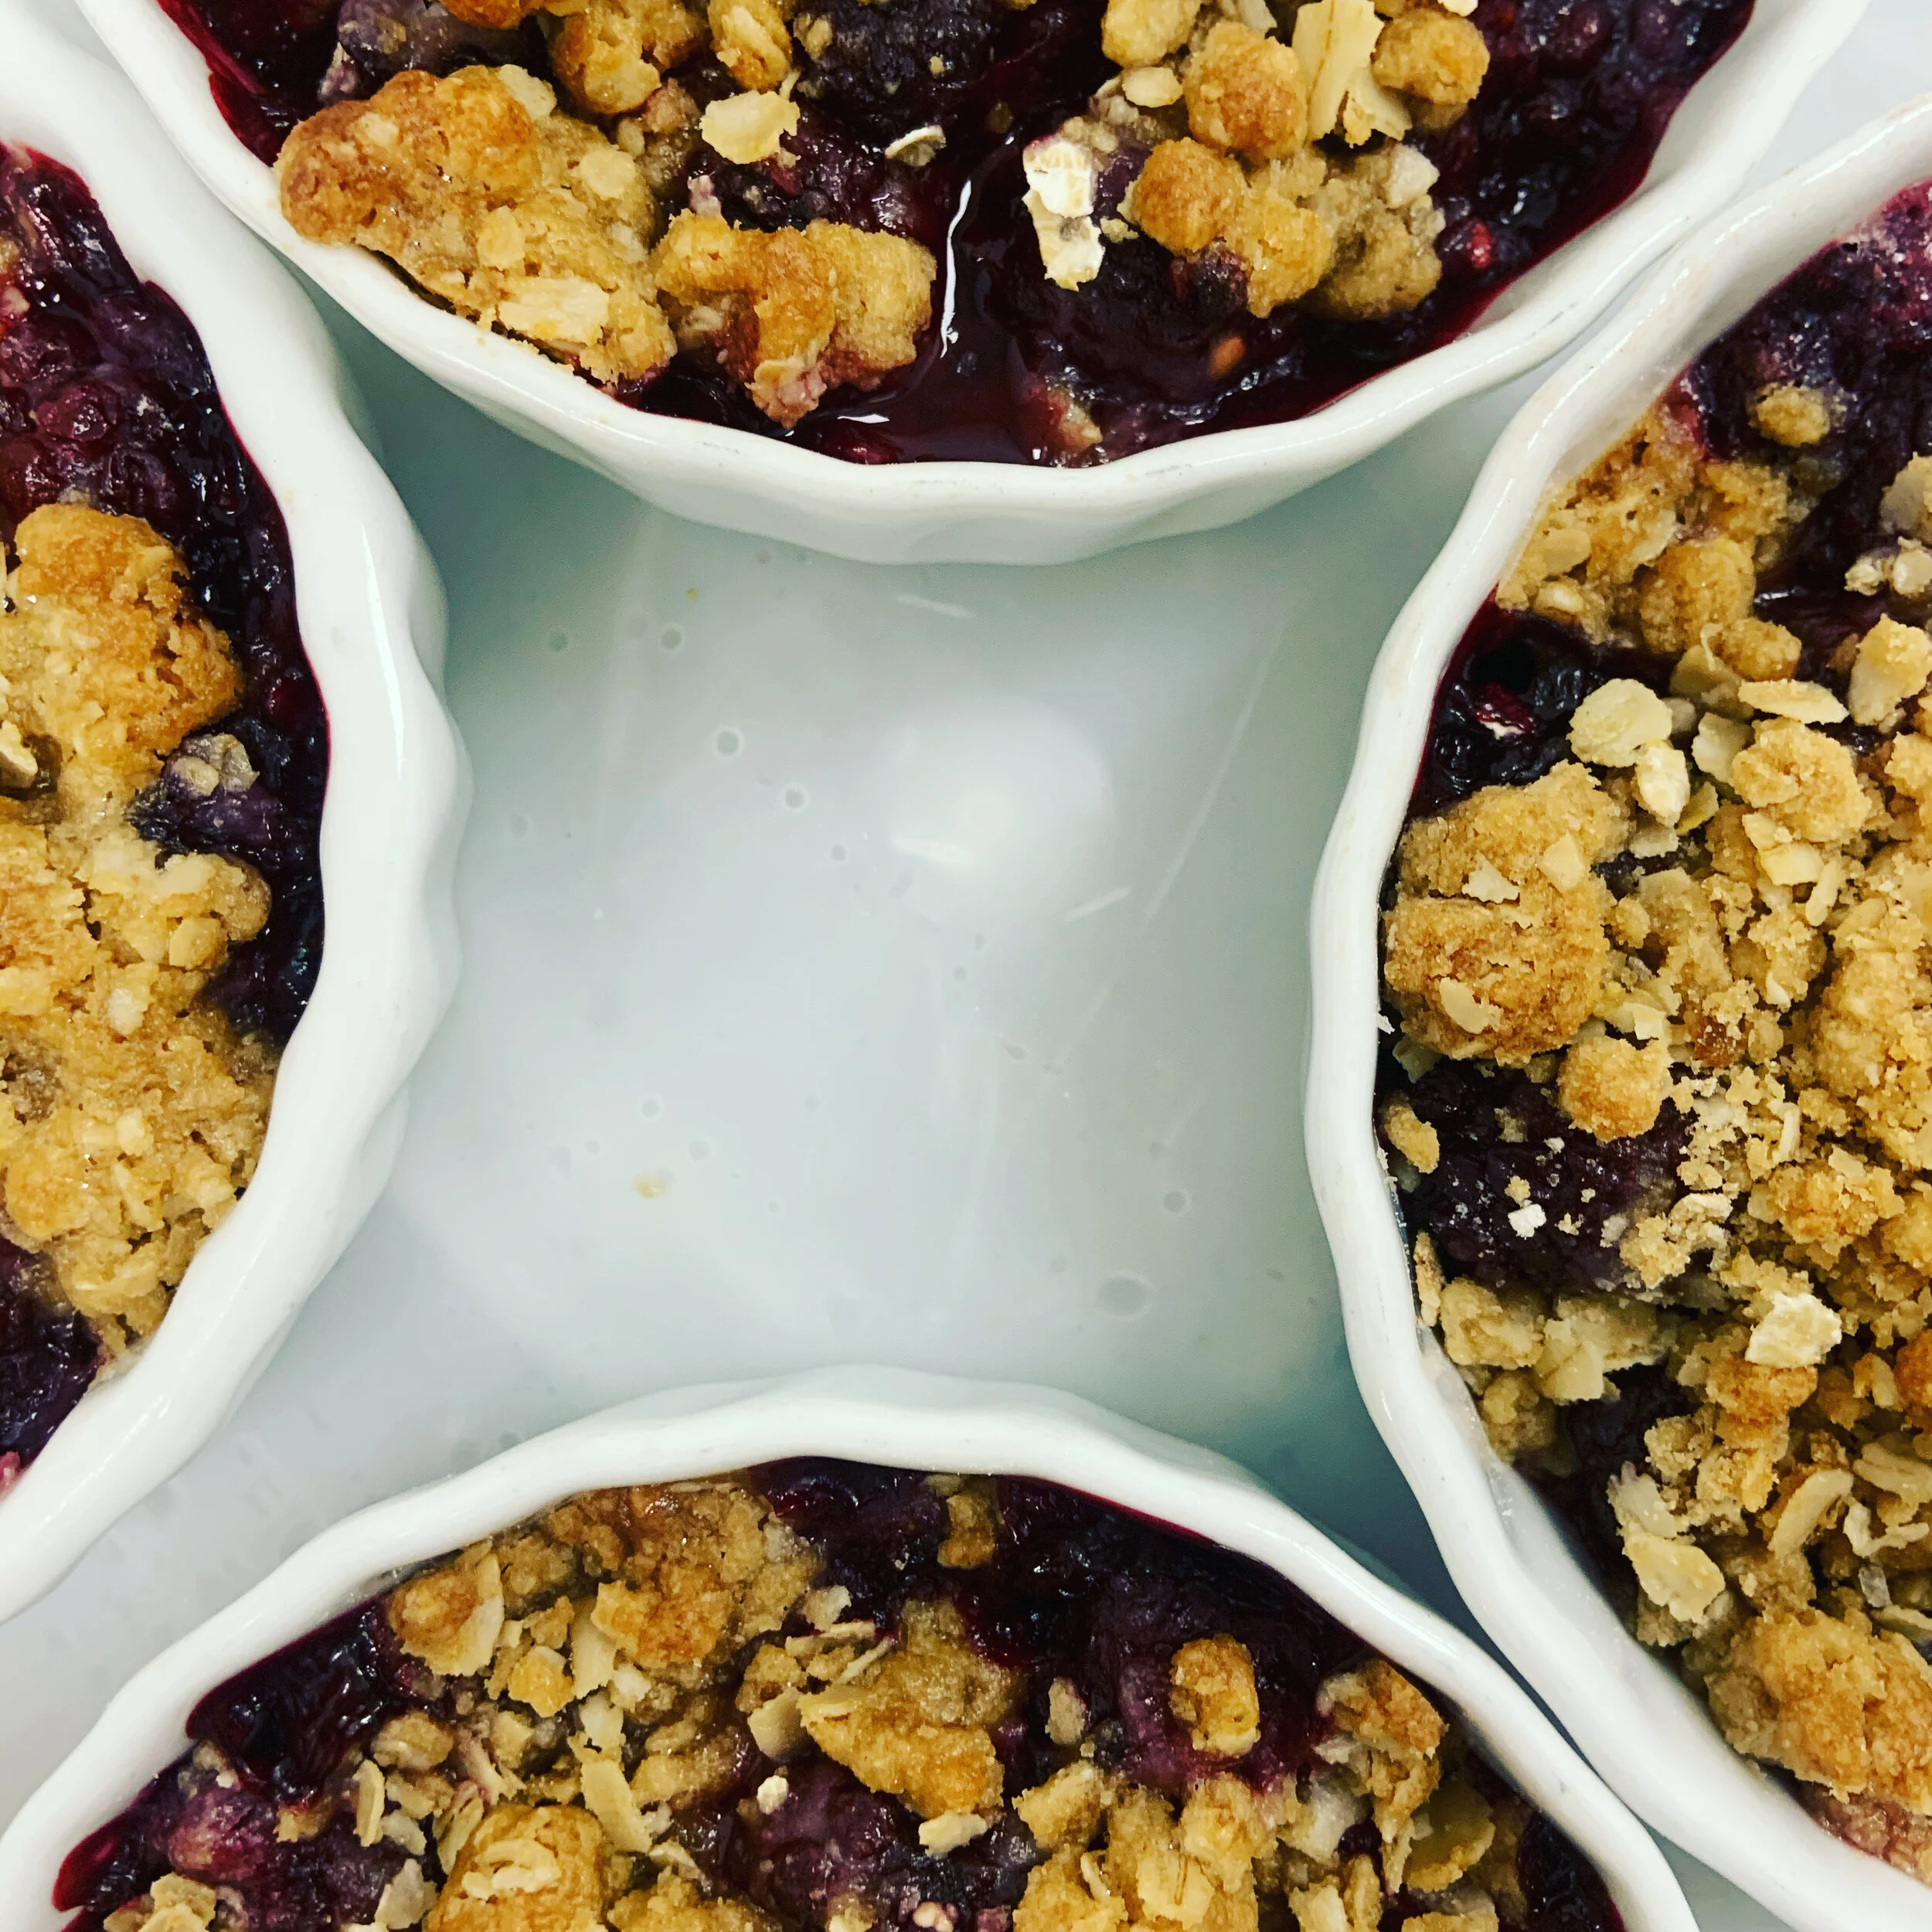
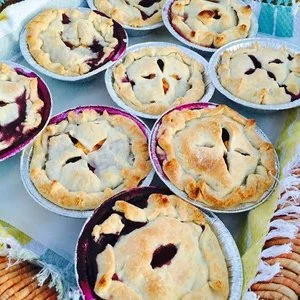
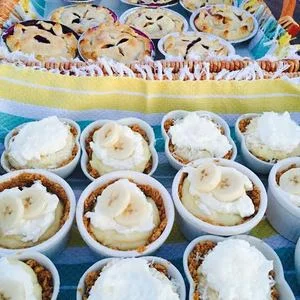
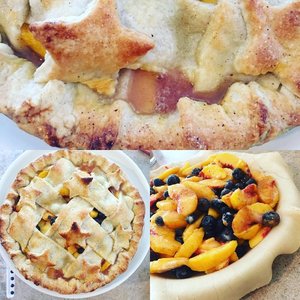
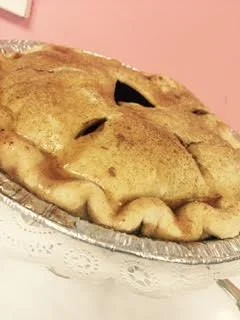
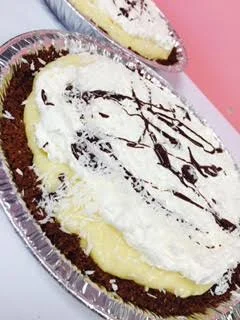
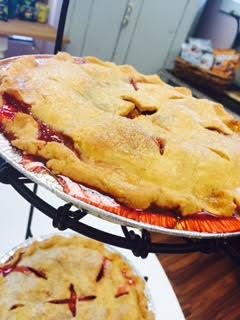
Pies
Cookie platters
Soups
Yum is just right around the corner!
Get your orders in now!
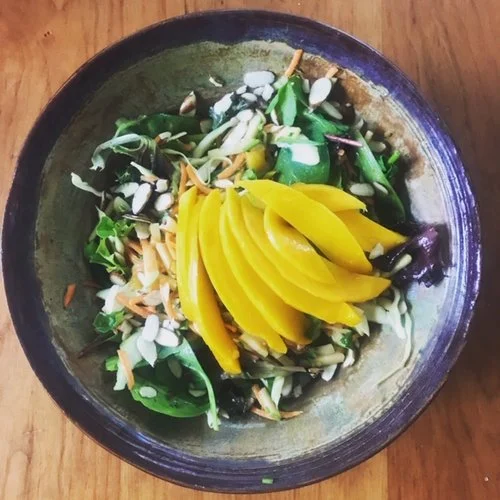
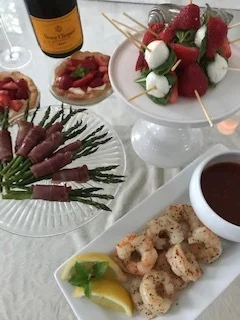
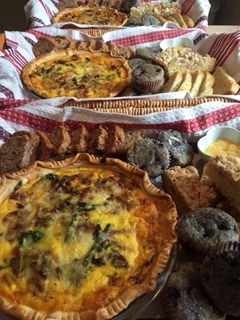
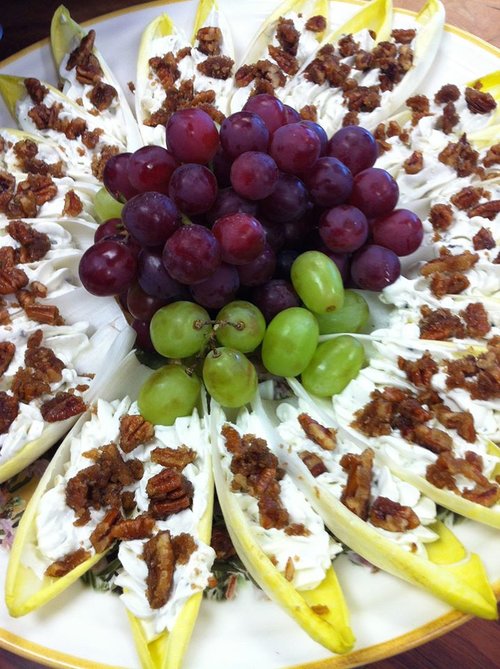
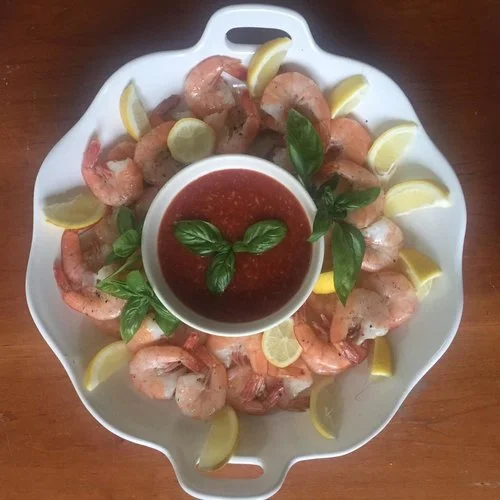
SUPPERS & STARTERS
Everyday is a good day to eat healthy, wholesome meals…


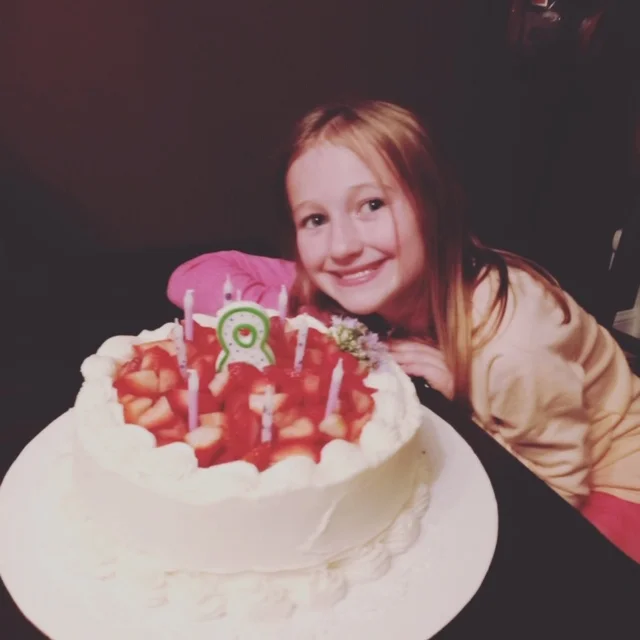
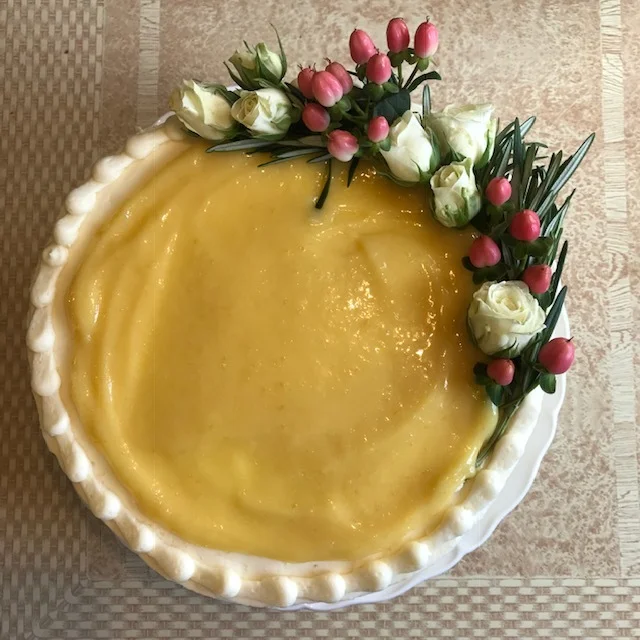
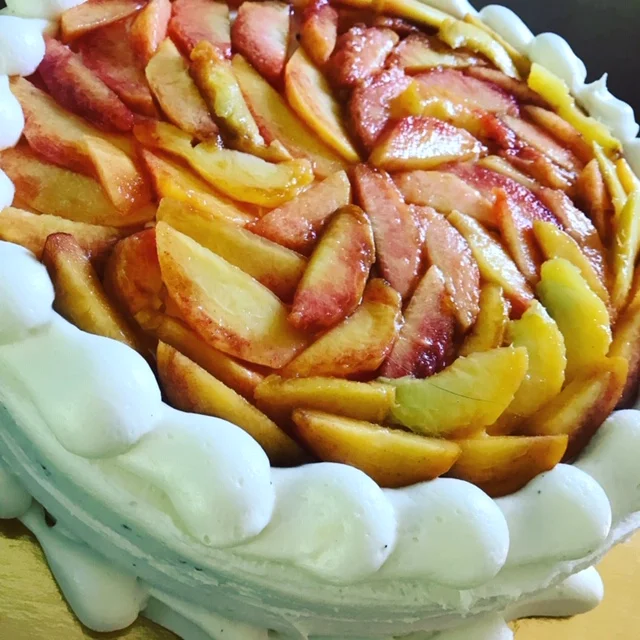
CAKES
Is it your birthday? Let us help you celebrate!
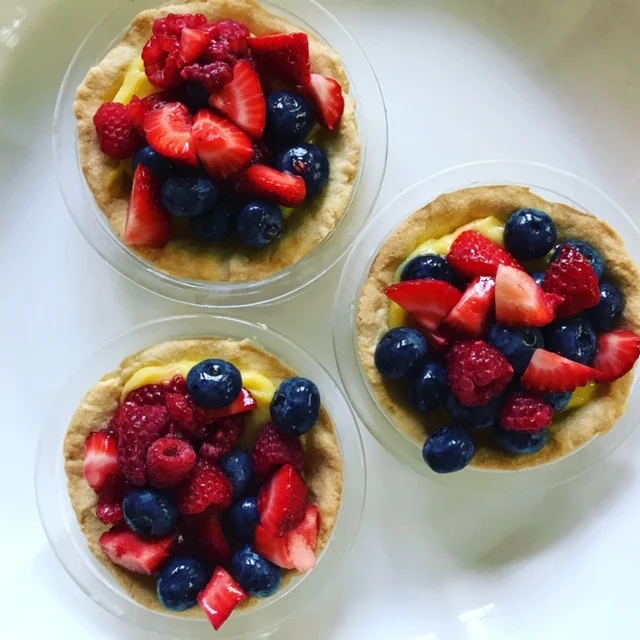


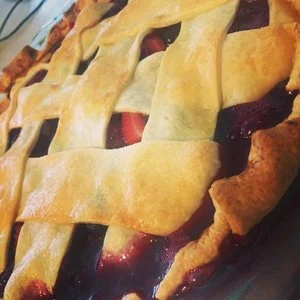
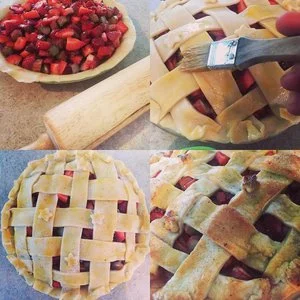
PIES
IT’S ALMOST PIE SEASON!

Posts
MORE POSTS FROM CORNER OF YUM…
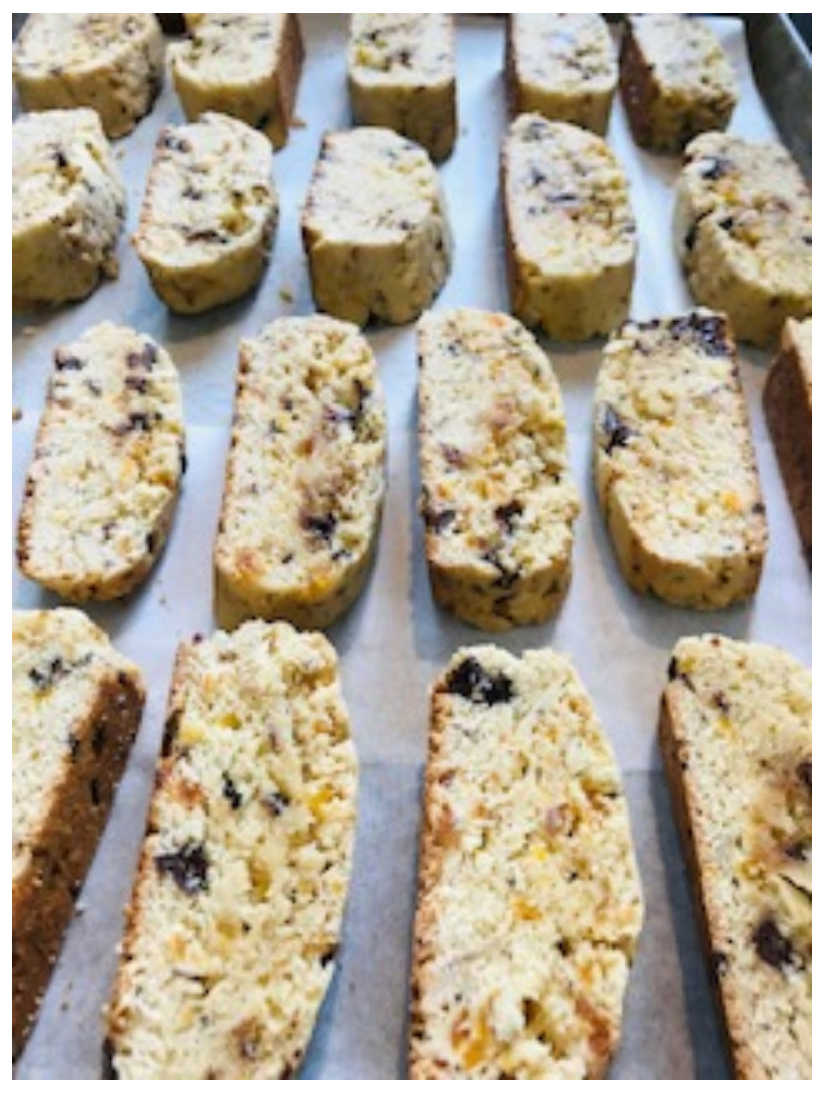
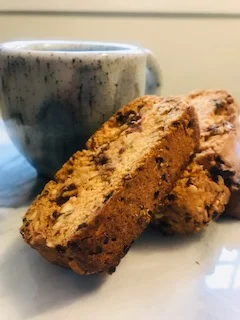
Apricot & Almond Biscotti Cookies
Take the cray-cray out of making biscotti at home with these tips and tricks from Carole @CornerofYum…
Biscotti Cookies - Corner of Yum
History
Biscotti Cookies have a long history
Today, these cookies may evoke thoughts of leisurely moments with coffee or wine with a delicious biscotti…
However, it’s been suggested that this cookie’s origins can be traced back to ancient times, when Roman Legions would carry these cookies due to their long shelf-life as nourishment during their long marches. Later it became a cookie associated and revamped within the Tuscan region of Italy. It’s been enjoyed by generations of Italians and people around the world ever since.
Mystery
Biscotti cookies have always seemed like an undertaking, a mystery..
All the steps seemed daunting. Until. Until, I was asked to make them one day, while wearing my pastry chef hat. (I don’t really have a pastry chef hat)
To tell you the truth, I was never the biggest fan of biscotti. Mostly because I like my teeth. Who knows how long those cookies have been in that glass jar? Anything dipped into hot coffee is not going to taste stale, lets get real here. The vendors peddling biscotti cookies are taking full advantage of their robust shelf life.
Illumination
However, I’ve got news for you…
Fresh biscotti cookies are a bit of a game changer, an eye opener, if you will.
A cookie that will make your dentist smile. They still offer the same dunkable capabilities that an old, washed up cookie does but finally, you’ve got a choice! To dunk or not to dunk? The ball’s in your court, sister.
Keep reading and while you’re at it, break out your butter, sugar, flour.. and the rest of it and get cookin’! 😋
Gather ingredients for Biscotti Cookies - Corner of Yum
Let’s do this
GATHER..
Gather the following ingredients to make biscotti cookies:
1 C sugar
1 stick of butter
2 tsp vanilla
1 tbsp. lemon zest
1 C chopped almonds (toasted to perfection in the oven)
1 C chopped dried apricots
3 large eggs
2 3/4 C flour
1 1/2 tsp baking powder
1/4 tsp salt
Biscotti Cookies before the oven - Corner of Yum
Next…
Complete the following steps:
Combine and mix sugar, butter & vanilla.
Add eggs and lemon zest.
Add dry ingredients.
Add almonds and apricot dough comes together.
Prepare a baking sheet with parchment paper.
Form two logs on the baking sheet and chill for thirty minutes.
Bake the dough in a preheated 350 degree oven for 30 minutes or until golden.
Chill for about 20 minutes. Note: The dough doesn’t need to be completely chilled, just not piping hot, so that it can be cut without falling apart.
Arrange your cookies on the baking sheet and bake for an additional 25-30 minutes, depending on your oven.
Biscotti Cookies after the oven- Corner of Yum
Delicioso!
Fresh and made with love - right from your very own kitchen.
Bravo!

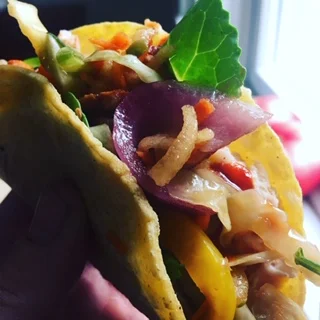
Vegan Tamales
Vegan Tamales…YUM!
I love Mexican food.
My southern California roots have me on a perpetual search for the creamiest refried beans, the most authentic taco & of course the perfect tamale.
I'll admit, I've always had a pound of lard lying await in my refrigerator, just in case a craving strikes.
Gather the yummy stuff…
However...
Making a big batch of tamales is the most perfect way to spend a chilly day indoors.
(We are in the midst of a nasty noreaster, here on the Cape, as we speak.)
MY FAVORITE FOOD TO HUNKER DOWN? HANDS DOWN - MEXICAN WINS
There's nothing like having a small surplus of tamales in the freezer to reheat when you're having a Mexican food emergency.
While looking at traditional tamale recipes, my first question was how do I replace the fat in the masa dough, without losing flavor and without using animal fat or processed oils. Avocado is the first thing that comes to mind and the clear winner. Using a high quality vegetable stock, in place of water, adds a lot of added flavor as well.
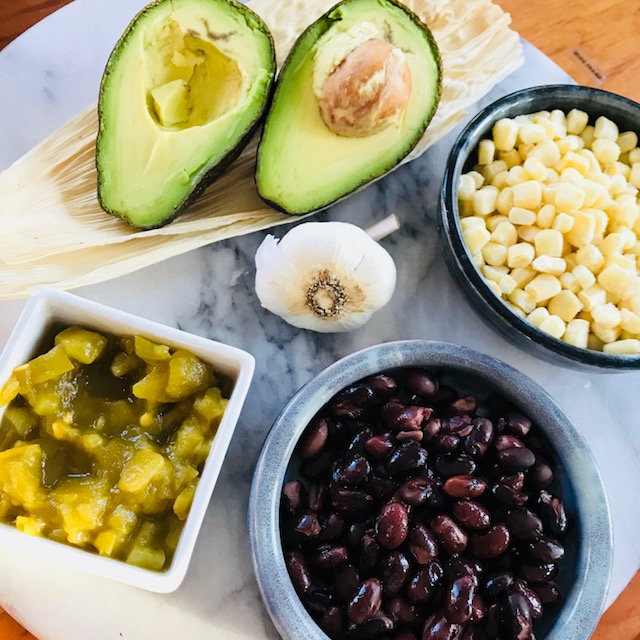
Here's a list of what you'll need -
ALL Ingredients:
1 8oz package of dried corn husks
MASA DOUGH INGREDIENTS:
1.5 avocados mashed
1 tbs sea salt
2 tsp baking powder
1 tbs mexican oregano
1 tbs thyme
1 tsp garlic powder
2 1/4 C high quality vegetable stock
FILLING INGREDIENTS:
1 Vidalia onion, diced
2 C black beans (or pinto)
1 serrano chile, diced
3 garlic cloves, minced
1.5 C corn kernels
2 4.5 oz cans green chiles
2 tsp ground cumin
1 tsp red pepper flakes
salt and pepper to taste
This being my first stab at a vegan tamale, I think I had pretty good success overall.
I'm excited to try a mixture of refried pintos with avocado and jalapenos. There are so many variations for curious experimentation!
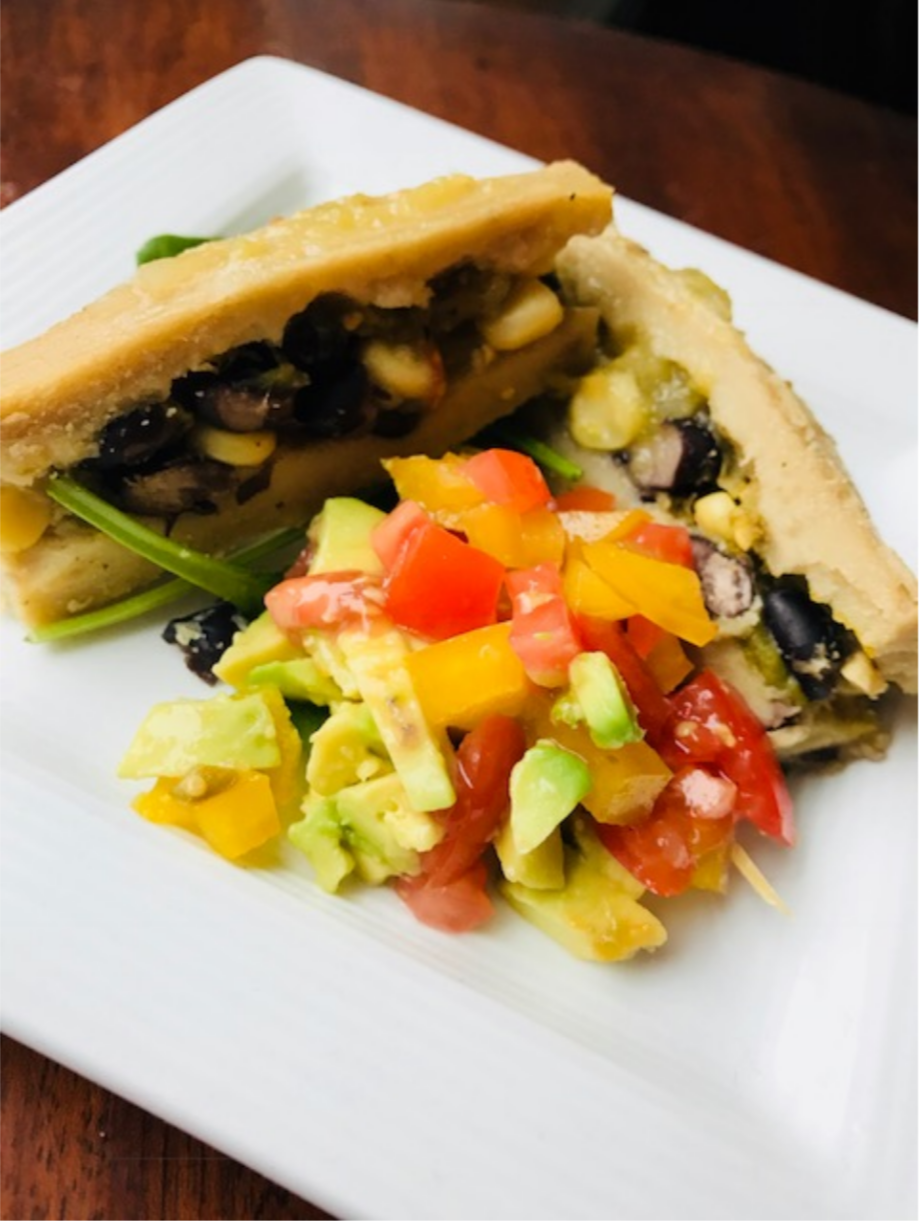
Don't forget to garnish your masterpiece with some spicy green sauce and diced up avocado & tomato salsa…
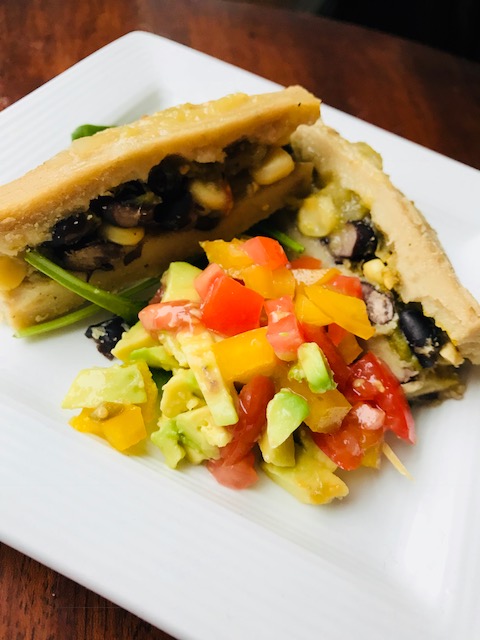
Roasted corn, black bean & green chile vegan tamales
Now for the play-by-play…
Instructions:
Soak your corn husks in a big bowl of cold water, for about 30 minutes.
Prepare your masa dough..
Mash your avocado and place it in your stand mixer, with your salt, baking powder, oregano, thyme & garlic powder. Scrape down the sides of your bowl and add half of your masa flour, while mixing on low speed. Add half of your vegetable stock and then the rest of your masa. Mix until the dough starts to come together and is well blended.
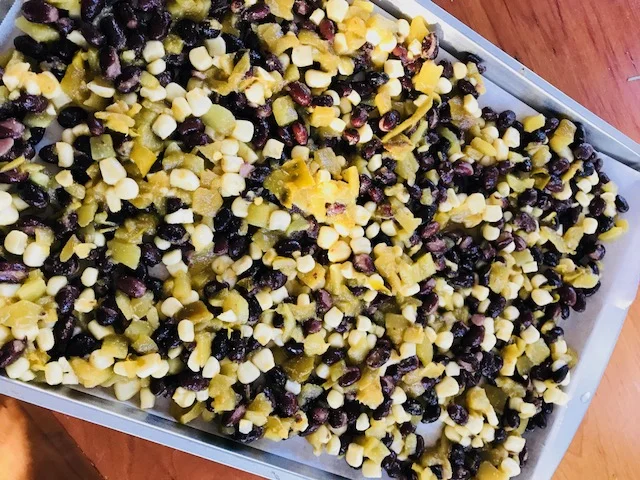
Prepare your filling..
Preheat the oven to 400 degrees.
Line a baking sheet with parchment paper.
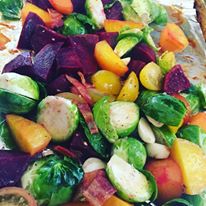
Chop your garlic cloves, serrano chile and onion. Add them to the rest of your ingredients in a bowl and toss with your seasonings. The juice from the green chiles will be enough liquid for roasting. Place your vegetables on the prepared baking sheet and roast for about 30 minutes.
NEXT ON THE VEGAN TAMALE MAKING AGENDA…
Assemble your tamales…
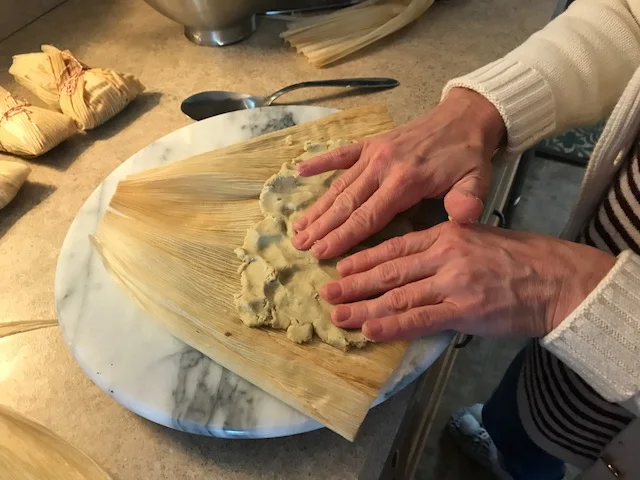
Start by putting about 1/3 cups of masa on your husk.
Spread it out, leaving about a 2" border around the sides.
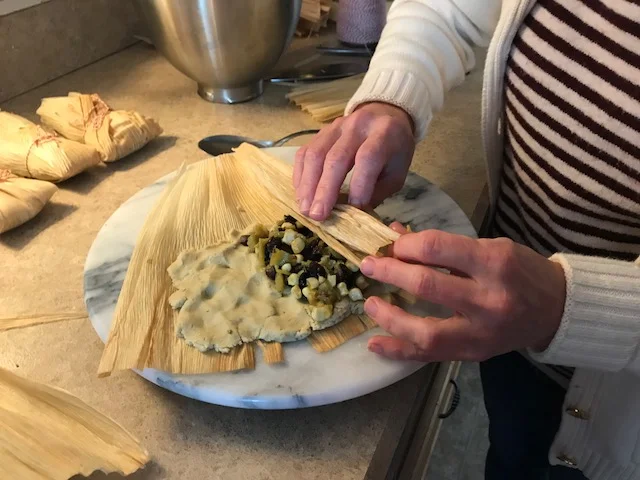
Place 1/4 cups of filling in the center and roll the husk to close it.
Fold one end of the husk over and tie it with either twine or a long strip of husk. I had a bit of difficulty using the husk and found bakers twine to be more user friendly.
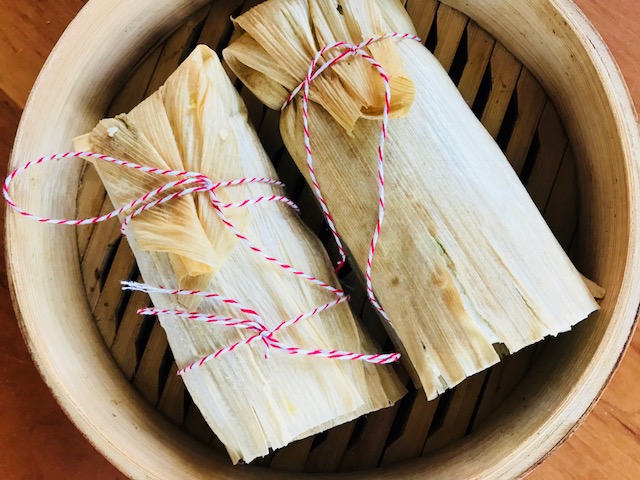
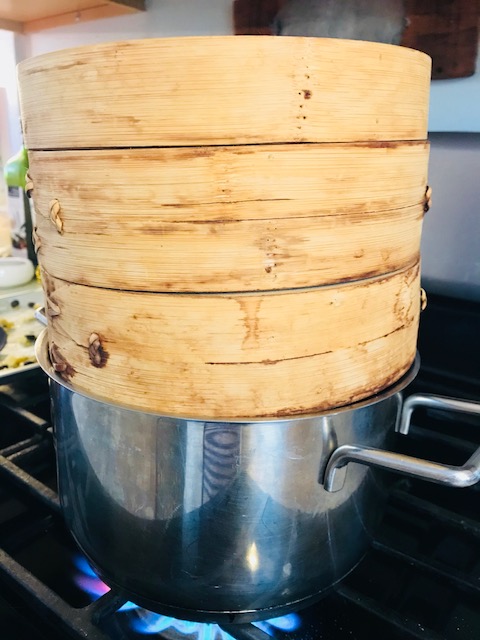
Place all your tamales in the steamer and simmer for about 1.5 hours.
VEGAN TAMALES AT HOME
THE PLAY-BY-PLAY IN PHOTOS
MAKE VEGAN TAMALES - CORNER OF YUM
MAKE VEGAN TAMALES - CORNER OF YUM
MAKE VEGAN TAMALES - CORNER OF YUM
MAKE VEGAN TAMALES - CORNER OF YUM
MAKE VEGAN TAMALES - CORNER OF YUM
All Done!
Fresh and made with love - right from your very own kitchen.
Good job! 😋
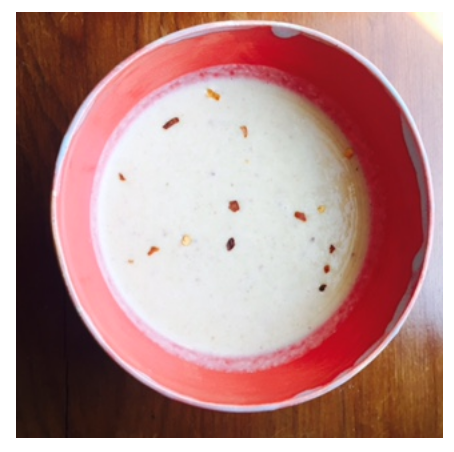
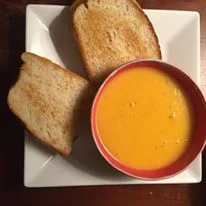
Creamy Cauliflower Soup with Bacon & Jalapeno
Fall and Winter is the BEST time for soup…
Creamy Cauliflower Soup with Bacon & Jalapeno
SOUP THAT WILL WARM YOU STOMACH…
AND YOUR IMMORTAL SOUL
Against my better judgement and solely for the sake of sending my body into a fat burning frenzy, I've been in phase 1 of Atkins world.
Cheese, bacon, fat, cream and (vegetables in moderation) is only fun for about 12 hours. I've never fantasized more about fruit and nuts in my life.. So, with this said, I introduce this creamy cauliflower soup that has all the tools needed for Atkins, phase 1. Or, if you love comfort food, this soup is for you.. You can also make easy substitutions to make it a healthy choice... Sub olive oil for butter, omit the bacon fat and use greek yogurt and chicken stock in place of the cream. Additionally, I think this is a great kid friendly soup, as long as you don't overdo it with the jalapenos.. I personally like to put jalapenos in anything I can because of it's awesome health benefits and it speeds up your metabolism. My 16 year old daughter eats jalapenos raw.. I'm so proud.
Let's face it, this isn't a health food recipe.
Although, there are things we can do to soften the blow.
I start with Trader Joes, uncured bacon "pieces". (and you can skip the step where I scrape the fat into the pan and saute the vegetables in it) Since we are just going to chop it up, pretty & neat strips are unnecessary. Choose organic vegetables and always try to use grass fed butter and dairy products.
In another few days, this clear betrayal that I've put my body through, will be complete and I'll be back on the fruit, nuts and greek yogurt. But until then, bring on the fat.. Here's how you do it..
Ingredients..
I head of cauliflower
1 jalapeno pepper chopped
1 cup chopped leek
2 tablespoons of butter
1/2 lb cooked bacon (save the bacon fat)
1/2 cup shredded cheddar cheese
approximately 2 cups of water
1 cup of heavy cream or 1/2 & 1/2
Salt & Pepper to taste
INSTRUCTIONS:
1. Cook your bacon until crisp.
2. Saute the jalapeno in leek in the butter and remaining bacon fat until tender.
3. Add cauliflower, water & bacon pieces. Cover and simmer until cauliflower is soft.
4. Add cheddar & cream and puree. I use an immersion blender but a standard countertop blender will suffice as well.
5. Salt & Pepper to taste..
...Garnish with hot pepper flakes and sliced avocado!
#atkins #kidfriendly #cauliflower
All Done!
Fresh and made with love - right from your very own kitchen.
Good job! 😋
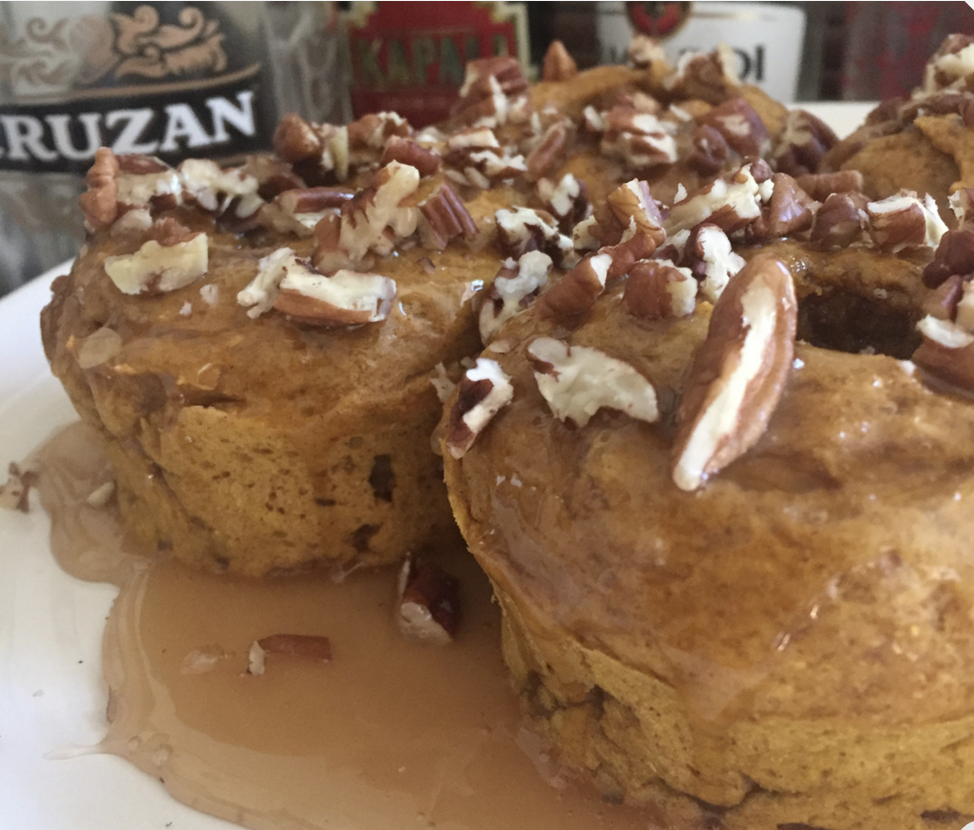
How To Make Maple Glazed Sticky Bun (cakes)
Like sticky buns? Get your fix whenever the mood hits with this recipe…
Maple Glazed Sticky Bun (cakes) - Corner of Yum
Yep.. fall is here.
The sun is shining here in the Cape but the air is crisp and fresh.
I love the fall.
I figured this was my opportunity to throw a pumpkin recipe out there. I don't love pumpkin and would have to say, loathe pumpkin lattes. But when you toss the threat of rum in there and a maple glaze, you've got something.
To be honest, this recipe evolved a couple of times, while testing it out in my kitchen.. I started out thinking, "It's fall, I should make something pumpkin". Then thought, pumpkin is boring.. Why not add maple? How cliche. How about some rum? And then it turned out it wasn't enough rum - is it ever? So, I added rum to the glaze, which was yummy but still not enough zazz. The chopped nuts on top were just enough to make it part cake and part sticky bun - nothing boring about sticky buns.
A couple of tips -- don't skimp on the rum.
Use a nice aged Cruzan or spiced Capt. Morgan…
Something rich in flavor.
Additionally, if you want to make it gluten free, just use a good gluten free flour blend in place of the flour in this recipe. I like to use "Cup for Cup", which can be purchased at either Whole Foods or Williams Sonoma.
I made one recipe making four small bundt cakes and then added chopped nuts and raisins to the remaining batter to make muffins for my children.
Keep reading and while you’re at it, break out your cinnamon, butter, rum.. and the rest of it and get cookin’! 😋
Maple Glazed Sticky Bun (cakes) - Corner of Yum
OK, let's go..
Cake ingredients -
2 1/4 C flour
2 1/2 tsp baking powder
2 tsp cinnamon
1/4 tsp salt
1 C brown sugar
1/4 C butter softened
1 tsp vanilla
2 large eggs
1 15 oz can pumpkin
3/4 C rum
Glaze ingredients -
1/4 C real maple syrup
2 tbsp rum
1 C powdered sugar
1 tsp vanilla
chopped nuts of your choice for topping the glaze (about 1 cup)
Time for the play-by-play…
Sticky Bun Instructions:
Pre heat oven to 350 degrees
Combine your flour, baking powder, cinnamon and salt in a bowl and set aside.
In another bowl, blend your butter and brown sugar until fluffy.
Add eggs one a time and blend
Add vanilla, pumpkin & rum until creamy.
Add the wet mixture to the dry and mix until blended - don't overmix
Put your batter into prepared baking dish or muffin tins and bake for approximately 25 minutes. You're done when a knife or toothpick inserted comes out clean.
Allow your cakes to cool before applying the glaze..
To make the glaze, simply heat all the ingredients in a sauce pan until there are no clumps from the sugar and the mixture is smooth. Allow to cool slightly before pouring it onto your cake as it will thicken a bit as it cools. The hot thin liquid will just run all over the place.
After you have poured your glaze on the cakes, top with chopped nuts (I like to use pecans).
To really give them that sticky bun edge, give the cakes and nuts another layer of glaze and nuts - most likely you won't regret it.
Yippe!! Cupcake Party Kits Have ARRIVED!
Corner of YUM is a sweet & savory catering service. Delivery is always free Cape-wide. You choose & order. I deliver and you enjoy. It's that simple. How easy is that? (DUH) Yum is just right around the corner! Get your orders in now!
Take the cray-cray out of making biscotti at home with these tips and tricks from Carole @CornerofYum…
Yay! We have a new look…
Vegan Tamales…YUM!
Get your paleo on with these cupcakes…
Fall and Winter is the BEST time for soup…